
How To Pair Wireless Lavalier Microphone?
Pairing a wireless lavalier microphone is usually simple, but the exact process depends on the kind of system you’re using. Some lav mics pair through a dedicated receiver, some connect directly to a phone through USB-C or Lightning, and some use Bluetooth. The confusing part is that all three are often advertised as “wireless lavalier microphones,” even though they behave quite differently.
The good news: most pairing problems come down to power, mode, distance, adapter compatibility, or the wrong input being selected in your recording app.
First, identify what type of wireless lav you have
Before pressing buttons randomly, look at the parts in the box.
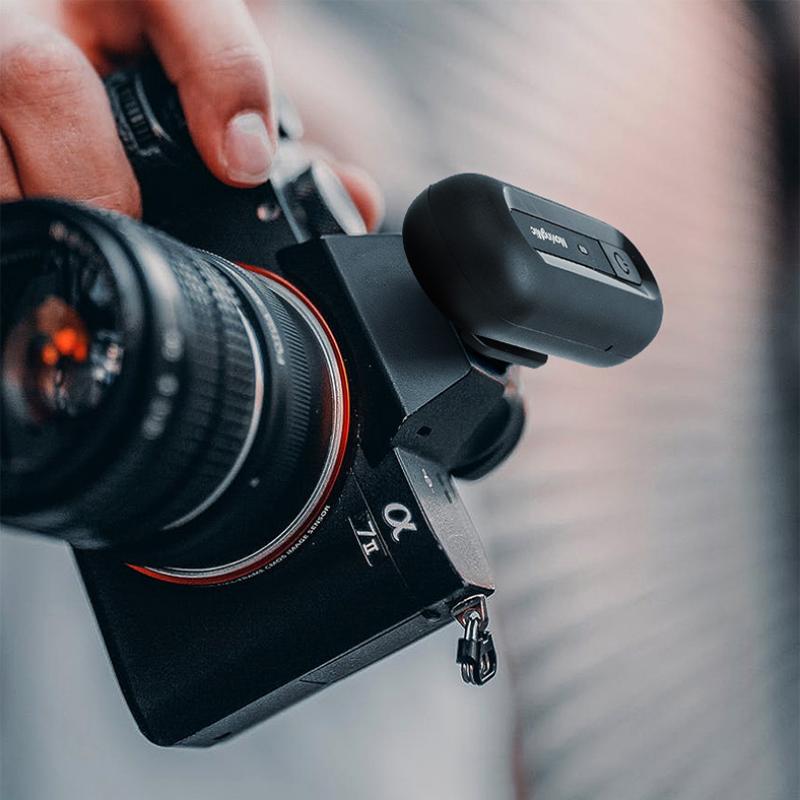
If your kit has a small microphone transmitter and a separate receiver, the mic pairs with that receiver, not directly with your camera or phone. The receiver then plugs into your phone, camera, or computer.
If the microphone has a tiny plug-in receiver with USB-C or Lightning, it’s usually designed for phones or tablets. These often auto-pair as soon as both pieces are powered.
If it’s a Bluetooth lavalier, it may pair directly from your phone’s Bluetooth menu. These are common for calls and casual recording, but they’re not always the best choice for video because Bluetooth can add delay and may use lower-quality audio depending on the app.
This distinction matters because many people try to find a dedicated 2.4GHz wireless lav in the phone’s Bluetooth settings. It will never appear there because it does not use normal Bluetooth pairing.
Pairing a wireless lav with a dedicated receiver
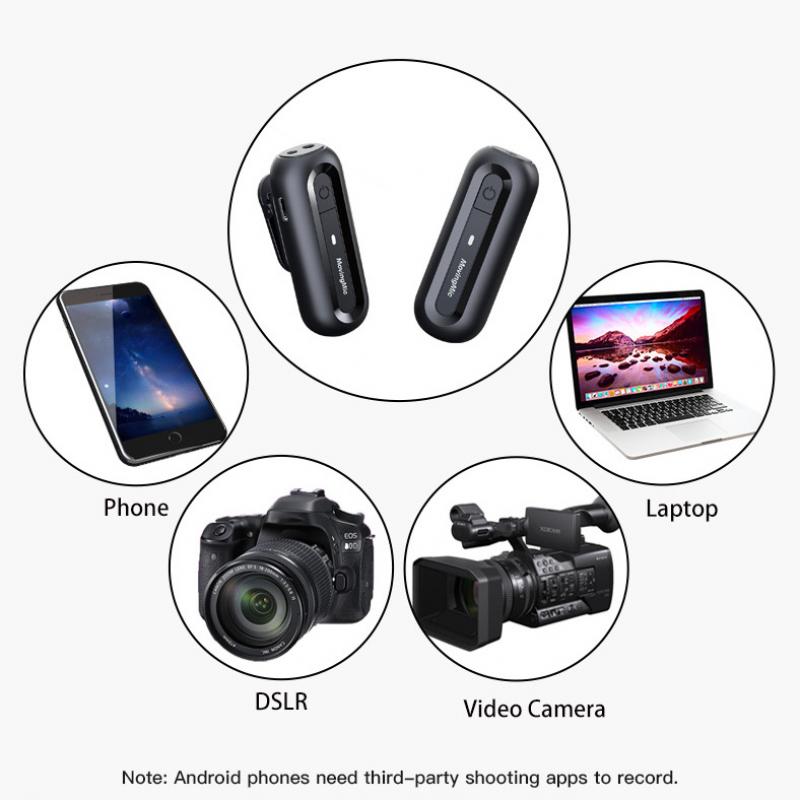
Most popular wireless lav systems — the kind used for YouTube, interviews, TikTok, vlogging, online teaching, and small productions — use a transmitter and receiver.
Start with both units charged. Low battery can cause strange behavior: blinking lights, failed pairing, short range, or audio cutting in and out. If the kit is new, charge everything fully before the first setup. Some units ship with enough power to turn on but not enough to pair reliably.
Turn on the receiver first, then the transmitter. Many systems automatically reconnect if they were paired at the factory. Give them a few seconds. A solid light usually means connected; a blinking light usually means searching. The exact color varies by brand, so don’t assume red always means bad or green always means good.
If they do not connect automatically, look for a pair, link, or sync button. On compact wireless lavs, this button is often combined with the power button, mute button, or a tiny recessed button on the side.
A common pairing method looks like this:
- Power on the receiver.
- Power on the transmitter.
- Hold the pairing button on the receiver until its light starts blinking quickly.
- Hold the pairing button on the transmitter until its light also changes.
- Wait until both lights become solid or the receiver screen shows a signal.
Some systems require the transmitter to be paired first, others require the receiver first. If the first attempt fails, power both units off and try again in the opposite order. It sounds basic, but it works more often than people expect.
Keep the transmitter and receiver close together during pairing — within a foot or two is ideal. Once paired, you can move farther away. Trying to pair across a room is a needless headache, especially in an area full of Wi-Fi routers, laptops, and Bluetooth devices.
Pairing a plug-and-play lavalier mic for iPhone or Android
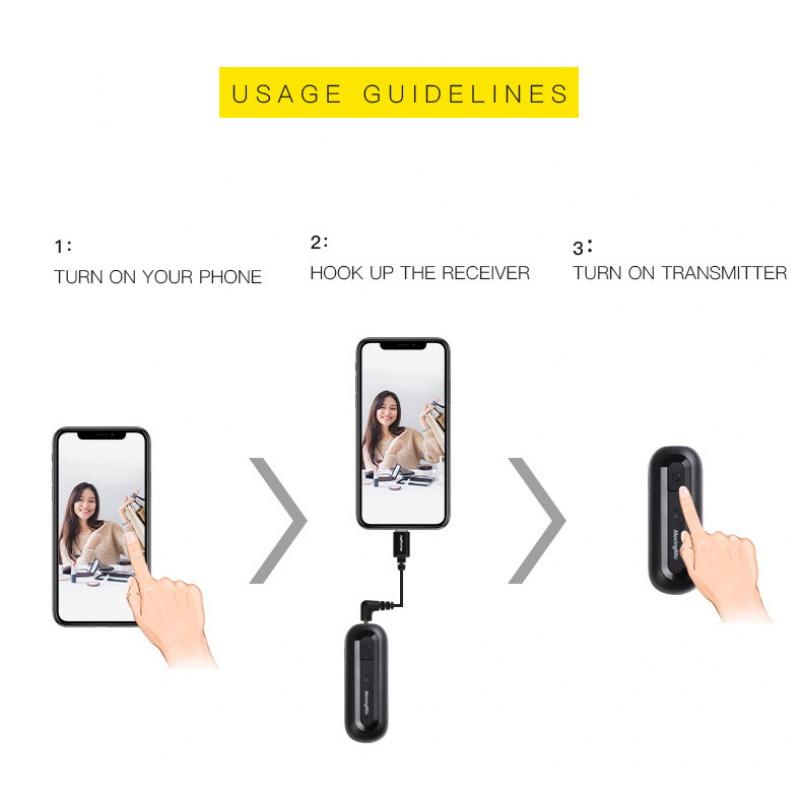
Many small wireless lav mics sold for phones include a receiver that plugs directly into the charging port. These are popular because they don’t require cables or menus.
For this style, plug the receiver into the phone first. If your phone has a case, remove it for the first test. Thick cases often stop the receiver from seating fully, especially with USB-C phones. The receiver may look plugged in while still not making a proper connection.
Then turn on the microphone transmitter. In many kits, the transmitter and receiver pair automatically within a few seconds. You’ll usually see a blinking light turn solid.
Open the camera app or voice recorder and make a short test recording. Don’t just look for lights. Lights only tell you that the mic and receiver are talking; they don’t prove your phone is actually using the external microphone.
For iPhones with Lightning, make sure the receiver is MFi-compatible or specifically designed for iPhone. For newer iPhones with USB-C, use a USB-C receiver that supports audio input, not just charging.
For Android phones, USB-C compatibility is messier. Some phones recognize external microphones instantly, while others need OTG enabled in settings. On certain Android models, the stock camera app may ignore the external mic even though a recording app uses it correctly. If the mic works in a voice recorder but not the camera, the problem is the app, not the microphone.
Pairing a Bluetooth lavalier microphone
A Bluetooth lav pairs more like earbuds.
Turn on the microphone and put it into pairing mode. Usually this means holding the power button until a light flashes rapidly or alternates colors. Then open the Bluetooth settings on your phone, tablet, or computer and look for the microphone name.
Tap the device name and wait for it to connect. After pairing, open your recording or meeting app and choose the Bluetooth microphone as the audio input if the app allows it.
Bluetooth lavs are fine for Zoom calls, voice notes, livestream chats, and casual use. For video recording, test before relying on one. Bluetooth can introduce audio delay, and some camera apps may not allow Bluetooth mics as cleanly as you’d expect. If you’re filming interviews, lessons, or paid content, a 2.4GHz wireless lav with a receiver is usually more reliable.
Make sure your recording device is using the lav
This is the step people skip most often.
After pairing, record a quick sample and tap lightly on the lav mic while speaking. Then tap near the phone or camera’s built-in microphone. If the built-in mic tap is louder, your wireless lav is not being used.
On a camera, check the audio meters. Plug the receiver into the correct microphone input, not the headphone jack. If the receiver has a TRS/TRRS cable option, use the right cable. Cameras usually need TRS. Phones with a 3.5mm adapter usually need TRRS. They look almost identical, but using the wrong one can give you silence or very weak sound.
On a computer, go into sound settings and select the wireless receiver as the input device. Apps like Zoom, Teams, OBS, Premiere Rush, and browser-based recorders may each have their own microphone selection. Your system can be set correctly while the app is still using the laptop mic.
On phones, the camera app may not show an input menu at all. That’s why the tap test matters.
If the mic pairs but there’s no sound
Start with the simple stuff.
Check whether the transmitter is muted. Many lav transmitters have a mute button that is easy to press accidentally while clipping it onto clothing. Some show a red light or muted icon, but cheaper models may not make it obvious.
Raise the gain on the receiver if it has gain control. A paired system can still record almost nothing if the gain is set too low. On the other hand, don’t crank it to maximum immediately. Start in the middle and record a test at normal speaking volume.
If you’re connecting to a camera, make sure plug-in power isn’t causing trouble. Some wireless receivers handle camera mic inputs easily; others behave better with certain input settings. If your camera offers manual audio levels, avoid automatic gain when possible. Auto gain can pump the background noise during pauses and make speech sound less natural.
If you’re using adapters, reduce the chain. A wireless receiver connected through a cheap USB-C hub, then a headphone adapter, then an extension cable is asking for problems. Test the mic with the simplest connection possible. Once it works, add accessories one at a time.
If the lav won’t pair at all
Reset the system if your model supports it. Many wireless lav kits have a factory reset or re-pair function. The manual may describe it as “clear pairing,” “restore connection,” or “ID reset.” This is useful if the transmitter was previously linked to another receiver or if you bought a multi-mic kit and the channels got mixed up.
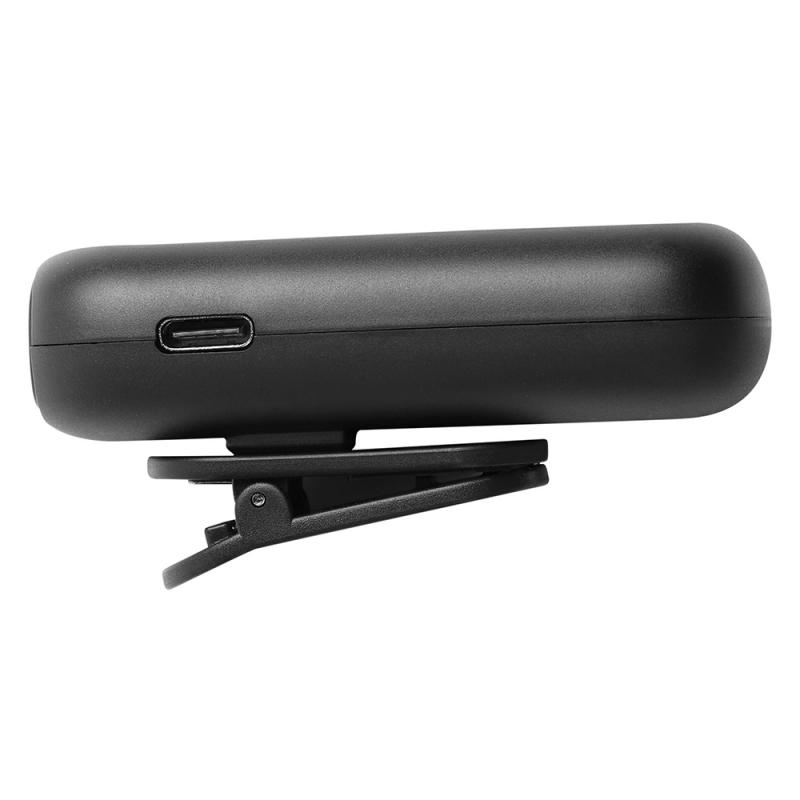
Charge the transmitter and receiver directly from a wall charger or computer USB port for at least 30 minutes. Charging cases can fail to seat the contacts properly, especially if the protective plastic film is still on the pins. I’ve seen brand-new mics appear dead simply because the tiny plastic strip on the charging contacts was never removed.
Move away from heavy wireless interference. Pairing on a desk next to a Wi-Fi router, laptop dock, wireless keyboard, phone, tablet, and Bluetooth speaker is not ideal. You don’t need a studio environment, but moving a few feet away can help.
If your kit has two transmitters, pair one at a time. Turn off the second transmitter while linking the first. Once the first is stable, pair the second. Some receivers assign channels automatically, and powering everything on at once can confuse the process.
Placement matters after pairing
Pairing only gets the signal connected. Good sound still depends on where you clip the lav.
Clip it around 6 to 8 inches below the speaker’s mouth, usually near the upper chest. Avoid placing it directly under the chin, where speech can sound boomy, or too low on the shirt, where it picks up more room noise.
Watch for clothing rub. A lav brushing against a jacket, necklace, beard, scarf, or loose collar can ruin an otherwise good recording. If the person moves a lot, use the included windscreen and leave a little slack in the cable or clip position. For outdoor recording, a furry wind muff is much better than the small foam cover that comes in many kits.
If your transmitter has a built-in mic, don’t bury it under thick fabric unless it’s designed for that. Hidden placement looks cleaner on camera, but it can make voices muffled and increase rustling noise.
A quick practical setup that usually works
For a phone: plug in the receiver, turn on the transmitter, wait for the solid light, open the camera app, record 10 seconds, and do the tap test.
For a camera: pair the transmitter and receiver, connect the receiver to the camera mic input with the correct cable, set camera audio levels manually, speak at real volume, and check the meters before recording.
For a computer: pair the mic system, connect the receiver by USB or audio input, select it in system sound settings, then select it again inside your recording or meeting app.
Once everything works, label the cables and keep the transmitter and receiver stored together. Wireless lavs are easy to use after the first setup, but the wrong cable or adapter can make a perfectly good mic seem broken. A short test recording before every important shoot is still the best habit you can build.


")


 Lens Filter Waterproof Scratch Resistant Nano-Xcel Series")


