72mm ND2-ND400 (9 Stops) 
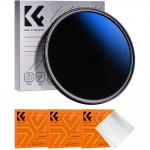
Variable ND Filter Neutral Density Filter for Camera Lens Ultra-Slim, Multi Coated

SKU: KF01.1391

  • 27.99
Overall Rating 4.8   35
Reviews
5
Cost effective/quick means to the same end
I had researched the qualities and capabilities of an ND filter. What I did not like was that each 'level' of ND effect were a separate lens and to buy a range of them would cost money and add bulk to your camera bag. When I found this variable ND filter, at a reasonable price, I ordered it. I like that, with one lens, I can change the density quickly by a simple rotation of the lens. Where as, if I had a set of ND filters, I would have to guess what effect I wanted, select a lens from the set, screw it on and hopefully not miss my shot. True, for a tripod set up and all the time in the world, you could try different lenses and compose your shot but most of my work is wildlife and at-the-moment shot. A great addition to my camera bag.
05/02/2021
Related Reviews
DementedDad DementedDad
5
YoLuke 5MP PTZ Outdoor Security Camera Review
The media could not be loaded.


 First, something about the camera style since this was the only thing I ended up not liking. I thought I would try the bullet style just to see what I would prefer and this one was a 5MP compared to the 3MP dome-style PTZ camera I already had. I prefer the dome-style since all the inner workings are covered and contained within the dome. This makes it much less obvious to an observer that the camera is in operation since the lens movement is obscured by the dome. With this bullet-style camera, the motion is in open view to anyone that can see the camera. It seems to me that having the dome covering all the moving parts also should protect them from dust or dirt accumulation. My environment in a barn lean-to is quite dusty and dirty. The dome-style gets mounted on the ceiling, giving the potential of nearly 360 degrees of view. This camera gets mounted to a wall giving only 180 degrees of possible vision, even though the camera itself is capable of panning nearly 360 degrees. This would work well if it were mounted on a pole out in the middle of the viewing area.Unpacking: The box contains everything that you will need to get started except the SD card. You will need the SD card only if you want to record video or pictures to it. I will mention the instruction manual here. It is very small and the printing inside is downright tiny. I had difficulty reading it without a magnifying glass! It is not very well written and actually contains only minimal information. Still, better than nothing at all.Setup: This includes installation of the microSD card (if desired) and screwing in the WIFI antenna. The antenna simply screws onto the top of the pedestal base. Inserting the microSD card is a little more challenging. On the back of the camera ball there are 4 tiny screws that have to be removed to expose the microSD card slot. Use a properly sized Phillips screwdriver and proceed with caution. On my camera the screws were very tight and difficult to remove, especially since the camera ball was hard to hold still while being able to apply enough pressure to break the screws loose. The upper screws are shorter than the lower ones. One of my lower screws became striped off and would no longer hold at all upon reassembly. Once the screws are removed the micro SD slot is exposed and the card can be inserted. Replace the cover and tighten the screws, but use caution and do not over tighten! My advice is to plan to do this only once and to put in the largest size microSD card supported (128GB).Installation: This is quite straight forward. The included little mounting bracket is nice. First mount it to the wall using two of the provided screws. Use a level to ensure that it is relatively level. If you get it on the wall in the correct orientation, the camera pedestal base slips right onto it. This supports the camera while the last two upper screws are installed. Note that the bracket screws are covered by the pedestal base. Connect the power converter and plug it in and the camera will turn on and run its self test.Connecting: This is the second YoLuke security camera I have and I still had difficulty. To me, the instructions are incredibly obscure here and many details are left out. Also, there are several different approaches to getting the camera connected to your network and the instructions do nothing to explain when or why any one of the ways should be used. I was eventually successful using the camera's own WIFI hot spot and my cell phone. Here is what I found to work. It takes only a couple of minutes if the steps are followed exactly. The factory reset is your friend if you run into difficulties!First, I installed the CamHipro app on my (Android) phone. I started with a brand new camera or did a factory reset (Press and hold the button on the end of one of the camera cables. A sound is produced when the reset occurs).In the CamHipro app I added a new IP Camera and chose New Device. I followed the instructions in the app (these are actually pretty decent) and selected "Not connected to the network cable." Then, I selected "Go add" for the AP distribution network equipment (bottom choice). I had my phone about a foot or so away from the camera and it worked fine. The next screen said "device not found" and all I did was select Refresh in the upper right corner of the phone app. If that hadn't worked, I would have done another factory reset and power cycle on the camera. Then I changed my phone's Wi-Fi to connect to the found hot spot for the camera. There was no Internet connection. Back in CamHipro, I selected the camera hot spot and logged in to the camera. The password (01234567) was automatically displayed in the app for me. I selected GO TO CONNECT. On the next screen I saw the UID for the camera, which I verified by looking at the sticker on the outside of the camera. The username is "admin" and the password is "admin" then I selected "ADD TO."I got a time out the first time. When it happened, I power cycled the camera, reconnected the phone Wi-Fi to the camera hot spot and tried again. Once in, I configured the camera to my preferred Wi-Fi by entering the Wi-Fi SSID (use the arrow to the right to search for it) and password. Next, I entered a name for my camera, This seemed important since I have more than one camera. The app automatically switched from the camera hot spot to the Wi-Fi I entered and the hot spot disappeared (until after the next factory reset). I have my Wi-Fi router set up to serve IP addresses automatically. The camera now appeared in the CamHipro app. I went into settings and set the device time setting first, then browsed through the settings menu and learned more about how to set up and control my new camera using the CamHipro app.To view and control the camera on my computer, I followed the computer browsing directions in the user manual. This will let me connect my browser to the web server in the camera. While this is adequate and gave me complete and full control of the camera, I ended up installing and using iSpy on my PC. All of the camera images included in the review were taken from there.Overall, this is a very nice security camera and I am glad to own it. Here are a few final thoughts:Pros:- Excellent picture and video quality.- Superb night images and video in black and white using the IR LEDs. I can easily observe the mice running around in the barn area.- Excellent night vision range with the IR LEDs.- Good Wi-Fi range. My camera is located 126 ft from the router with one intervening exterior house wall, which is beyond the normal expected Wi-Fi range of about 100 ft. It works decently well like this. I did get occasional control delays and picture disruptions. I installed a high-gain, 11dB, Wi-Fi antenna (cost about $8 on Amazon) and that completely resolved those issues in my situation.- Pan and tilt are responsive, quick, and smooth. The zoom feature is a little slower, but works nicely.Cons:- Somewhat tricky initial connection and set up.- Bullet style camera allows an observer to easily see the camera movement and potentially exposes the moving parts to more dust and dirt.- IR LEDs glow red when on, also making it obvious to someone seeing the camera at night that they are being observed.- Wall mounting limits the field of view to 180 degrees even though the camera is capable of panning nearly a full 360 degrees.
28/07/2022
Customer
5
Great wide angle lens that takes high quality phot
I love that I can fit more people in the frame and I can take a bigger view of the scenery. Can’t wait to bring this to Banff next month. I just wish that it weighs lighter and not bulky.Customer service is excellent! I lost my lens cap and they responded quickly and replaced it for free! Thank you! Highly recommended!
02/07/2022
SkedAddled
5
Beats everything else
Best current option.If you've shot film with SLR cameras, or digital with DSLRs,you'll know there's one huge advantage over other cameras: Interchangeable lenses.The same is true with the current mirrorless cameras, as well.Well, this little bugger is a tiny powerhouse.With a 3480x2160 capture resolution, it's full-on UHD as far as webcams go.Stereo microphones, too.Noise-reduction is admirable, particularly in low-light scenarios.The graininess and pixellation from cheap webcams just doesn't come throughon this like it does in the $40 El-Cheapos. The 'active' noise from cheaper camerasin low light doesn't dance around your display, as this one shows fine clarity.White balance, color, sharpness, contrast, saturation, and more can be definedwith software such as OBS. This places the camera nearly into top-line DSLRcameras of today. While you can't get the same image clarity at large print sizes,you can certainly get awfully close to duplicating your DSLR on-screen.Best thing is, there are thousands of C-Mount lenses which can be fitted to this.They can cover everything from telescpoe to microscope, wide-angle to telephoto,macro, fixed, and everything in between.I ordered mine with a Varifocal 5-50mm zoom lens, and it's done extremely well so far.While the optics aren't quite what I'd expect from such a lens, the results are stillrather impressive, so I'll see what I can get from it. Meanwhile, C-Mount opticsare all over the range of capabilities and prices, so you shouldn't have any troublewith finding alternative lenses.This camera is a solid thumbs-up.
19/05/2022
ToniMarley
5
I would love to say how much I am enjoying this le
I would love to say how much I am enjoying this lens, however I had it for a total of an hour before my daughter fell in love with it and I have not seen it since! So if you want to know "is this a good product" My 19 year old LOVES IT! Now I will order one for myself and hide it from the rest of the family!
10/03/2022
Joseph A. Arena
5
WOW ! You have to see it to believe it. See my e
WOW !!!!! I just received my Rogue Safari DSLR Pop-Up Flash booster from Amazon today. Waited until dusk to take my first test photos.I shot a series of shots using my Canon 70D, on program mode, iso=automatic. I shot with a Sigma 18-300 mm 3.5-6.3 lens.For each series, I took three shots. The first set (top of each example) with just the camera's pop-up flash. The second set of three (bottom of each example) was with the Rogue Safari booster.Each set contained a shot taken at 135mm, 200mm and 300mm.The images in these examples are directly out of the camera. Absolutely no editing was done. I simply loaded the images to my ThumbsPlus software and did some screen grabs, dumping those grabs into Photoshop. Again - I didn't edit a single image.See for yourself the results. I wasn't prepared to be so pleased. I'm looking forward to taking the Rogue Safari with me to Costa Rica next month, for two weeks in Corcovado National Park. It's super lightweight (a couple of ounces maybe ?) Goes onto the hotshoe easily.I guess my only semi-negative remark is that I can't see the focal length of my lens, looking down from the top of it, when the Rogue is on the hot shoe. I think I can live with that.And, if anyone is wondering. NO - I don't work for Rogue. I don't know anyone that works at Rogue. And I bought this at full price ($19.95) from Amazon this week.I'll update my review when I return from Costa Rica in late February, hopefully with some great shots.
02/02/2022
Manuel Mendoza
4
Very well built
The Xenvo Pro Lens Kit for iPhone and Android is very well built out of good, solid material and seems to be very durable. It does exactly what it claims: close up and wide angle photography. So it is recommended if you are willing to take advantage of these two features. Images are very clear and sharp, it works well for both stills and video.
16/05/2021
scotttor scotttor
5
High Quality - Good Tutorial Provided
Just got my lens today, so far so good. Very high quality. Wide angle works as expected - see before and after pictures with this post. Comes with a USB computer plug in set of tutorials which are very informative. Also comes with a lighting clip when taking micro shots. Look forward to using this product.
28/02/2021
J. Shaddox
5
Hands down the best bang for your buck
I've had this in one of my lists for while and I got a notification when it became a lightning lightning deal so I ordered it right away. I specifically wanted it for the macro lens and it does the job just fine. The only alternative I had my eyes on (after researching the best macro lenses for iPhone) was what I assume to be overpriced because you are required to purchase a case for the phone that holds the lens in place. Not with the Xenvo which is simply clip-on and I've had no issues with it since using it.What Xenvo needs credit for isn't just the technical/functional aspect of the lenses but for everything else included in the package. The price is fair enough just for the macro and micro lens but what they also include is a sturdy bag that holds the lenses, a lanyard for hanging the lenses around your neck for quick easy access when you're on-the-go, a microfiber cloth, an additional clip-on led light that is very useful for preventing inevitable shadows and a micro-usb cable that charges that led light. Also included is a usb-key attached to a card that loads up some videos showing how to use everything. These days I think any company that doesn't skimp on equipment that you will or probably need to buy additionally should receive extra credit. It shows that they care and aren't greedy.The only extra thing I'd like to get from them is the remote shutter-bug and I'm happy to pay extra for that.I doubt any other company can beat this package at this price and the lenses are great. You will get a surrounding fisheye effect with the macro-lens and some aberration the farther you shoot from the subject but that's a bonus effect imho. This package is a no-brainer.
10/02/2021