Reviews
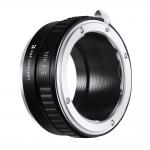
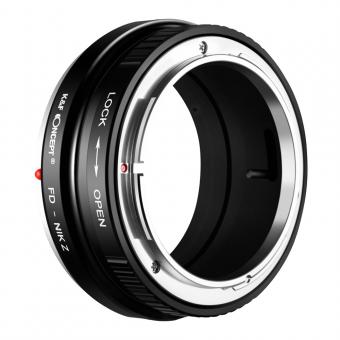
Quality-built adapter for vintage Nikon lenses
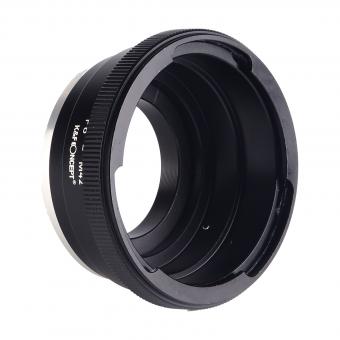
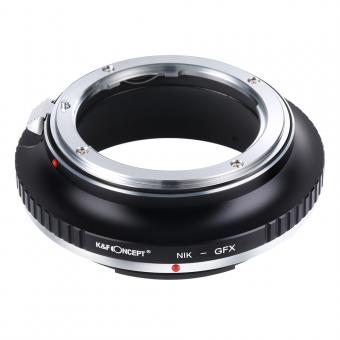
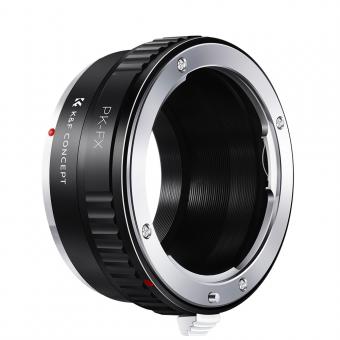
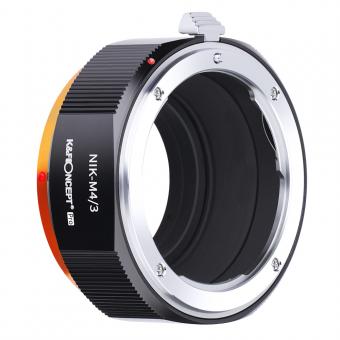
This adapter enables a physical mount of Nikon AI (non-electronic) lenses to the Sony a6000 series camera body. It is solidly made, the connection is snug and smooth, and the release mechanism works well. Lenses operate in manual mode only. Adds about one inch of length to the lens and makes already weighty Nikon glass a few ounces heavier.
08/10/2019
Related Reviews
Celestron 70mm Travel Telescope: great value spott
For around fifty quid this is a decent little travel ‘scope. The main tube is aluminium, the objective lens is an air spaced doublet, and its dual photo-tripod / dovetail mount will also allow it to fit on a proper astronomical equatorial mounting. Throw in a backpack, a couple of eyepieces, an erecting prism and a tripod and you have an excellent value package.The bundled eyepieces are considerably better than expected for the money and give x40 and x20 magnifications (10mm and 20mm respectively). The rack & pinion focuser and the objective lens mount unfortunately are both made of plastic. The tripod is wobbly when the legs are extended and the pan/tilt head is not the smoothest I’ve seen - but it is better than nothing and you can always buy a decent photographic tripod or even a proper equatorial mount later. The optics of this package may not be perfect but they are fine for direct visual use - offering sharp detail, low colour fringing and fairly wide flat-field views. Whilst perfectly usable as a spotter, you should note that the 'scope is not weather-proof.I bought this on a whim – interested to see whether it might be usable as a telephoto lens. Where else are you going to find a new 400mm f5.7 lens for this money? Out of the box, the ‘scope seems reasonably sturdy (tripod excepted). For direct visual use, the image quality it offers is very respectable and much better than any of the half-dozen sub £100 spotters that I have to hand. As a telephoto lens, however, it suffers from low contrast due to internal light scatter from the side-walls, a lack of ultimate sharpness from optical misalignment, evident edge of frame focus-softening (due to field curvature) when using large sensors (APS-C or larger), and of course, from the curse of all refractors: chromatic aberration.Here’s a quick dissection of the product - as delivered …T-MountThe handbook doesn’t even bother to mention it – but the outside of the eyepiece holder is threaded. If you have a T-mount adapter for your camera then you can mount your dslr etc directly on the back of the ‘scope for prime focus photography.Rotatable eyepiece mountThe eyepiece mount is a screw-fit onto the chromed focuser tube (both are plastic, sadly) and has an associated locking collar – together these features allow you to square-up any attached camera without having to fiddle with a T-mount’s grub screws.Adjustable pressure plate on the focus tube:A knurled screw at the back of the plastic focuser housing allows you to softly clamp the focuser tube in place (to prevent inadvertent focus shifts). The chromed plastic focuser tube slides smoothly in its guides and, with very little backlash in the rack and pinion, offers precise and easy focusing.Focus travel:For visual use (20mm eyepiece plus erector prism) the closest focus is about 13ft from the front of the scope. The focuser tube has about 70mm of available travel - and the point of focus lies about 50mm outside of the fully racked-out eyepiece holder. Notice that this means that you cannot focus the scope when using eyepieces alone (for traditional inverted astro views), the erector prism (or an eyepiece extension tube) is essential to provide an adequate optical path length to give a focused image. The scope, however, readily allows infinity focus with a dslr on a T-mount (tried with Pentax and Olympus dslrs) – though with mirrorless compact system cameras extension tubes may be required to compensate for their shorter lens-mount to sensor distance. With a heavy camera, however, to reduce the extent of ‘rack-out’ of the focuser and the consequent strain on the thin plastic focuser tube, I'd advise the use of a camera-extension T-tube. Extension tubes have the added advantage of enabling closer focus.Eyepieces:The eyepieces have standard astronomical 1.25 inch push-fit mountings – with real, chromed-metal, nose-pieces. The 20mm eyepiece is a three element inverse Kellner (I’ve not taken the 10mm one apart yet!). It offers a very respectable image: geometric distortion is not excessive and sharpness is good across the claimed 50-degree apparent field of view. The 10mm eyepiece is ok – but the apparent field of view is noticeably less than that of the 20mm one.Lens Cap:The supplied lens cap is a two piece item – offering the option of viewing through a central aperture of about 42mm in diameter (effectively reducing the scope’s aperture from f5.7 to about f9.5) … handy for looking at bright targets. The restricted aperture also has the useful side-effect of reducing chromatic fringes. This smaller aperture, however, causes a degree of vignetting - so that photographs darken towards the edges and corners of the frame when using 4/3rds and larger sensors. For smaller sensors (e.g. ¼ or 1/3 inch web-cams or CCTV cameras) this is not a problem.Alignment:The optical axis of the focuser is out of alignment with the centre of the objective’s mounting (by about 4mm in my case) and it shifts as you tighten the focus tube clamp screw.No collimation or centring adjustments are provided.Moulding ‘flash’ in the lens holder and on the lens retaining collar means the objective lens is not squarely seated or evenly clamped.Contrast:The objective lens is not edge-blackened so image contrast is lower than it could be.The lens retaining collar is polished and reflects general glare down into the scope.The inner barrel of the eyepiece mount is polished plastic (very bad - if using a T-mount for prime focus photography).The push-on lens hood is too short to offer much protection from stray off-axis light.The internal baffles and the smooth matt black painted interior are of only limited effectiveness in controlling light scatter.Field curvature limits the scope’s photographic (prime focus) usefulness to small sensor cameras (4/3rds or smaller).Mechanical:A heavy camera attached to a 1.25 inch push-fit adapter (e.g. for eyepiece projection) would be in serious peril of falling to the ground because the plastic eyepiece holder has only two, small, eyepiece-securing screws. Only the T-mount option offers adequate mechanical security to an otherwise unsupported camera.Some simple suggestions for DIY Improvements (this is for dedicated tweakers only):Please note – implementing some of the following suggestions will invalidate your guarantee … so proceed at your own risk.1 - Fit a longer lens hood:Non image forming light, bouncing off the interior of the scope, floods your camera’s sensor with useless illumination – sapping colour-saturation and contrast from the scene. This is less problematic with direct visual observation (or photography through an eyepiece) - as the eyepiece’s restricted field of view shuts out some of this indirect light. A camera’s naked sensor, on the other hand, has an extremely wide field of view, it can ‘see’ the illuminated side-walls just as well as it can see the direct image-forming light from the lens, so considerable pains should be taken to prevent indirect light falling on it. The simplest and least invasive improvement would be to extend the length of the plastic lens hood using a tube of (black) cardboard … 12 inches or so should work wonders.2 - Line internally with velvet or felt:The interior of the narrow bore focuser tube is particularly prone to scattering off-axis light and funnelling it down towards the camera’s sensor. Black felt is a good lining material though the best absorption of stray light is obtained with velvet. The front half of the main tube will also benefit from a lining of black cloth.3 - Insert an eyepiece’s nose-piece (for prime focus photography):The inner barrel of the eyepiece holder is polished plastic – it reflects light easily and for prime focus photography this needs to be tamed. The simplest solution is to borrow the chrome nose-piece from one of your eyepieces, line it with felt and fit an O-ring over one end. The O-ring will stop the nose-piece falling into the ‘scope and damaging the objective lens. The O-ring will also block the sliver of light that squeezes through the gap between the outside of the nose-piece barrel and the inside of the eyepiece holder.4 - Remove mould flash from the lens mount and retaining ring:The objective lens sits on a ring moulded into the plastic lens holder and is then clamped in place by the screw-in front retaining ring. Both the seating ring and the retaining ring show slight moulding ‘flash’. This needs to be removed. Use a small craft knife to scrape away the excess plastic from the lens mounts – to provide a level seating surface and an evenly-distributed retaining-pressure for the lens. When reassembling, the retaining ring should be tightened only just enough to stop the lens rattling within the mount … excessive and uneven pressures will cause the lens-pair to distort.5 - Black-edge the objective lensThe matt-ground edge of the objective lens scatters non image forming light into the ‘scope. The lens is a doublet:: a pair of lenses separated (and held together) by three small plastic wedges sandwiched between the front and rear elements. You can remove the lens-pair from its mount (taking care not to separate the two elements) by unscrewing the front retaining ring. Cleanliness is vital - handle the lens only with soft glass-cleaning cloths or cotton gloves. Use a black permanent marker pen to blacken the edges of the lens pair. Note – the thinner of the two lenses is the outermost one – so reassemble accordingly.6 - Paint the lens retaining ring matt black:The lens retaining ring has a smooth polished inner surface which reflects stray light down into the scope. Line it with felt or paint it matt black.7 - Collimate:Although no collimation adjustments are provided there are a couple of simple things that can be done to improve the scope’s optical alignment. You will need a laser collimator for this – available on Amazon from around £20. If you fit the collimator in place of an eyepiece, its beam will partly bounce-back from each of the air-glass surfaces of the lens. Three reflections should be seen in the collimator’s window (four - if you are extremely unlucky) – they will not be narrow pinpoints as they are reflecting from quite highly curved surfaces. Ideally, however, all the reflections should centre on the laser’s exit aperture in the middle of the collimator’s screen. You will be lucky indeed to have three such centrally co-located reflections. In my case, initial tests showed only one reflection on the collimator’s screen … the other two were so far off-axis that the reflected beams didn’t even make it back into the eyepiece holder!7.1 - Align the Axes of the Focuser and the Main Tube:To see how far out of ‘true’ the axis of the focuser is with that of the main tube try the following test. On a thin sheet of paper, scribe a circle with a drawing compass. The scribed circle needs to be exactly the same diameter as the outside of the main tube. Remove the lens hood and the objective lens-holder then temporarily tape or glue the paper circle over the open end of the main tube - ensuring that the rim of the tube lies exactly on top of the scribed circle. The pinprick on the paper (caused by the compass) will then lie on the central axis of the main tube. Fit the laser into the eyepiece holder and switch on. The distance between the central pinprick and the laser spot shows just how far out of alignment the focuser is with respect to the main tube.If the laser beam lands on the centre of the scribed circle, consider yourself lucky. If, however, the laser spot is far adrift from the scribed circle’s centre point then you can try the following tweaks: Remove the three screws that fix the focuser to the main tube. Rotate the whole focuser assembly and see whether the laser spot moves towards the centre of the paper circle. I was fortunate; I found that I only needed to rotate the entire focuser unit by one screw-hole (i.e. by 120 degrees) to obtain a reasonably centralised laser spot. If you find that an intermediate degree of rotation gives the best result, you can bore three new pilot holes in the focuser’s plastic body – to accept the original retaining screws. More drastic remedies include elongating the three screw holes in the main tube - allowing the entire focuser to be 'wiggled' into alignment.7.2 - Centre the Objective Lens:The objective lens is a loose fit in its holder – there is perhaps a millimetre or so of lateral rattle-room to play with. Having first aligned the focuser’s axis with that of the main tube, you may then care to try moving the lens from side to side, within its holder, to try to make the multiple laser reflections all fall on the centre of the collimator’s screen. This needs to be done with the scope pointing vertically up - and the lens clamping ring removed. There may not be sufficient ‘free play’ available within the lens mount to achieve perfectly returned reflections – but, as in the case of the focuser unit, you can also try rotating the entire lens mount by 120 or 240 degrees to improve the degree of coincidence of the multiple laser-spot reflections. The reflections test is extremely sensitive and the simple the act of tightening the eyepiece retaining screws to clamp the laser will cause large shifts in the positions of the returning laser spots – so don't be overly concerned with precise spot locations … just getting them all onto the laser's target screen is achievement enough.None of the above suggestions should be regarded in any way as condemnation of the 'scope. As a visual scope for spotting or simple astronomical viewing, the compromises of design and construction have been well chosen by the manufacturer and, straight out of the box, it performs much better than its modest price tag might suggest. Asking it to perform in more demanding photographic applications, however, shows the need for better control of stray light. Fortunately these simple mods are well within the capability of anyone raised in the ‘Blue Peter’ school of diy – and tackling them should reward you with a more versatile and better performing bit of optical kit.I give it five stars – for its value for money – and for the ease with which inveterate diy-ers (like me) can have a go at pushing its performance towards the limits of its theoretical capability.
31/12/2022
Great Product
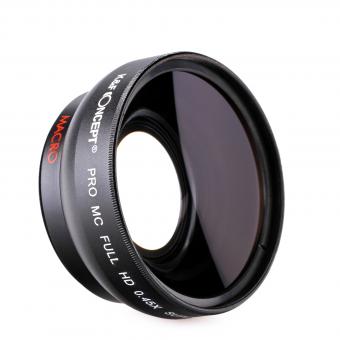
I just received the lens kit. I have been snapping some photos around the office and it does a wonderful job. I have been trying shots with and without the lens just to see the difference and it is significant. the Macro is very clear and made for some fantastic close ups. The product comes in a very nice package and the un-boxing is a nice experience. I feel the people selling this lens kit take a lot of pride in their product and it shows in the quality for the price is very good. Great video tutorials on the website make for a great experience.
16/11/2022
Amazing! AMAZING! A M A Z I N G!
Kai Pei and Xenvo! Amazing product! Build quality and performance is top notch.. So many budget lenses floating around that are cheap, vignette like crazy and barely perform and here you guys are holding it down! If you're looking for a lens kit for your phone, you've probably heard of Moment... Over $100 per lens. Sure they are the best, but Xenvo will NOT disappoint!I can't wait to see what else Xenvo comes out with! I'd immediately buy more lenses, especially an animorphic lens!
02/11/2022
Great for spider photography
I got this phone lens because everyone in my spider groups was recommending it for taking pictures of our little spoods. My photos come out really nice and clear! The jumping spider photo, that spider is the size of a grain of rice! And look at the details you can see with this lens! Super cool! Highly recommend.
10/10/2022
NIFTY FIFTY proves itself
Took an expensive beginner class and had the knowledge to take decent pictures...But my 18-55mm lens (that came in my amazon purchased kit) didn't give me that WOW factor. I became frustrated easily... With this lens, in just a few clicks, I fell in love. This lens really performs well for the price. They call it the 'nifty fifty' for a reason. I have been able to get professional looking pictures with it, and because every picture seems to come out looking gorgeous, it really gives me the confidence to keep learning.
26/01/2022
W O W
I absolutely love this lens. I’m starting to get more into photography again so I bought this lens and... W O W. I used my cats as my little guinea pigs to test it out and the photos attached are what came out. This is minus any photoshop or editing. Thanks Amazon!
11/07/2021
Five Stars
Love it!! My husband bought this lens for a big family trip. I was a little wary of it but was incredibly surprised how great it was! We would take same selfie picture with my phone and his with the lens and his was able to get all 4 of us nicely while mine cut off faces. I highly recommend!!
02/07/2021
Simple yet effective
I wanted lens that could do wide angle and macro. Full stop. Nothing else. There are other lenses that are cheaper and have more lens combinations. But this is perfect for what I want. The material quality is excellent and pictures are beautiful. The video tutorials on the website are simple and effective. All in all a good long term investment.
18/02/2021
Top Bestselling Products
-7%
-7%
-23%
-23%
-6%
-7%

