Related Blog

1 C Mount Lens Small
 Carbon Tripod Lightweight Portable for Travel Photography")
TC2335 (Orange) Carbon Tripod Lightweight Portable for Travel Photography
$98.35
Save Instantly
Add to Cart

T6 Solar Bluetooth Portable Speaker IPX5 - Dual Speakers With Microphone
$44.99
Save Instantly
Add to Cart
 Carabiner Bag for Action Camera and GoPro Accessories")
GoPro Handy Case for Hero 11/10/9/8, Hero7 Black, 6, 5, 4, 3+, 3, Hero (2018) Carabiner Bag for Action Camera and GoPro Accessories
$17.99
Save Instantly
Add to Cart
/DJI Osmo Action Action Camera Handy Case")
GoPro Hero 8/7/6/5/4/3+/3/2/1/GOPRO HERO (2018)/DJI Osmo Action Action Camera Handy Case
$29.99
Save Instantly
Add to Cart

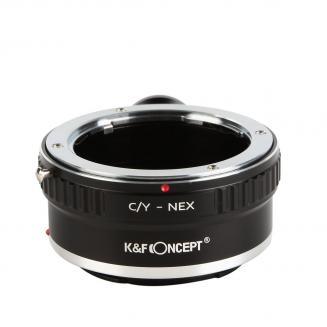
Contax Yashica CY Mount Lens to Nikon Z6 Z7 Camera K&F Concept Lens Mount Adapter
$25.99
$27.99
Save $2.00 Instantly
Add to Cart

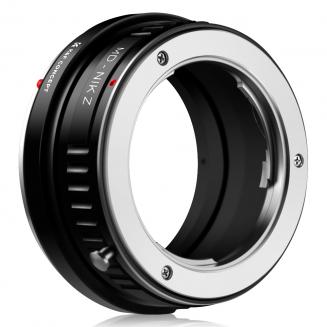
G AF-S Mount Lens to Nikon Z6 Z7 Camera K&F Concept Lens Mount Adapter
$29.99
$31.99
Save $2.00 Instantly
Add to Cart

Olympus OM Mount Lens to Nikon Z6 Z7 Camera K&F Concept Lens Mount Adapter
$25.99
$27.99
Save $2.00 Instantly
Add to Cart

Minolta MA AF Mount Lens to Nikon Z6 Z7 Camera K&F Concept Lens Mount Adapter
$25.99
$27.99
Save $2.00 Instantly
Add to Cart
Related Product
Related Reviews
The best mount ever!
I loveeeee this phone mount. It has made my life so much easier.1. I don’t have to worry about adjustable arms breaking, rendering the mount useless.2. The magnet can be placed on the case or directly on the phone.3. The length of the hook can be adjusted to fit pretty much any size vent blades.The only adhesive used is the one to attach the magnet to the phone/case.I love this mount so much, it is the only one I use.
25/12/2022
Great product
Are use this Lens mount on my new canon M 50, unfortunately the camera was defective but the lense mount did its job.
21/11/2022
there's more to this than meets the eye
i was just looking for something that i could use to get closer to a small object. this does that perfectly. i did not realize when i ordered it that it actually consisted of two well constructed lenses. when the two are used together they make a wide angle lens. additionally it came with a small rechargeable diffused light to use with the macro lens. the light came with a clip to attach to the phone, but i find that it works better if handheld. comes with a lens cleaning cloth, protective case to hold everything plus a lanyard. very pleased with the outfit.
16/10/2022
I am so skeptical
I saw the price and said 'why not' and was very pleasantly surprised.1st - the price is great. How do they do it and still make a profit??2nd - sound quality is very impressive. It is small but whoa the sound is loud and clear and you get clear bass booms and mid range and just the right amount of treble and doesn't sound tinny as some small speakers do.3rd - You even get a cute little carry case for it with a carabiner on it and holes so you don't even have to take it out to sue.4th - highly recommend.
07/09/2022
Perfect fit for Canon SX230HS
I actually bought this case over the counter at a store near me. I had seen so many reviews expressing disappointment with Amazon recommended camera cases that I decided to examine some cases first hand for my new
Canon PowerShot SX230HS 12 MP Digital Camera with HS SYSTEM and DIGIC 4 Image Processor (Black)
before buying. Of all the cases I looked at this one was the best fit and was constructed as well or better than any other case in this size/price range. My SX230 fits snugly in the case but is by no means "tight". I can easily remove the camera without it feeling awkward. With my SX230 placed in the case with the lens mount forward and in the upper part of the case I can put a spare battery at the very bottom of the small front pocket and have it set against the face of the camera below the lens mount. A small sleeve in the front pocket will hold a spare memory card in a case or several cards without a case. A strong belt loop and a neck lanyard give you carrying options. The items mentioned above are about all you're going to fit in this case but it should be great for holding all your needs for day or weekend trips out and about.
12/07/2022
I wish English was my First Language so I could ex
This is the first telescope I own, but not the first I use.1. It is unbelievably small, yet provides better magnification than larger ones I used.2. The telescope looks nice.3. EasyScope is easy to adjust, but needs some tweaking, because the knobes did not go as far as it needs to correctly align with the main telescope.4. The selection of earpieces that come with the telescope is great.5. Great customer service! I have sent an email to Orion and Celestron asking for the package dimensions (to see if they could fit my travelling bag), Orion answered me in a few hours with the information I asked. Celestron took 3 days to answer the following: "As a policy we cannot provide such information.". REALLY?!I am glad I bought this!P.S.: When I unboxed the product, the piece that attaches the main tube to the tabletop stand was screwed upside down. Easy to fix, and not a big problem after all.
19/03/2022
Excellent choice for use as a travel scope for wid
I was in the market for a good small scope that I could use at a moment’s notice with a minimum of fuss and bother and that I could also use as a travel scope without having to baby it. I already own two telescopes (in addition to several binoculars) – a JMI RB-66 on a large alt-az mount (consisting of two 6” reflecting telescopes yoked together and used like a giant binocular) and a Takahashi Sky90 refractor on an equatorial go-to mount. I love both scopes, but the JMI is heavy, cumbersome and a beast to move around. The Sky90 is a lot smaller and lighter, but, when combined with the equatorial mount, it’s still a little too big and heavy to run outside and use on a whim. It was also expensive enough that I’m not comfortable using it as a travel scope where it’s likely to undergo some rough handling. As a result, what I usually found myself doing was grabbing a set of binoculars and using those. There’s nothing wrong with that, except that the image is too shaky to be of much use or to get much enjoyment out of. Enter this scope – at least on paper, the specs were ideal for my needs: It has an aperture of 80mm, which is a good compromise size that should permit decent planetary viewing, lunar viewing, wide-field star viewing (essential for sights such as the Pleiades and certain star clusters) and at least the more prominent individual stars. It’s got a short focal length of 400mm, which makes it more portable and lighter than scopes with a longer focal length. It appeared from the specs to have a stable mount, which is essential for steady viewing. It contains all the accessories necessary to get you started – 3 lenses, a diagonal and a finding scope. And finally, it is being offered at a low enough price that I wouldn’t hesitate to use it as a travel scope. But be aware that this is a compromise size for a telescope. A focal length this short pretty much limits you to lower magnifications. Push the magnification too high and you’ll end up with various optical aberrations, unless you spend a lot of money to get a premium scope that is built to overcome those limitations. This is just a matter of the physics of the situation and it’s going to be a limitation for this sized scope, no matter who makes it. On the other hand, a scope of this size gives you a wider field of view than a scope with a longer focal length and there’s a lot to be said for wide-field telescope viewing. In addition, more aperture is almost always better than less aperture, since the larger the aperture, the more light that will be gathered. However, each small increase in aperture results in much higher prices and much larger sizes. As I said previously, for my purposes, 80mm was a good compromise. There are two other “compromises” in the specs for this particular scope of which the buyer should be aware: First, the diagonal provides an upright image, much like a spotting scope would; and second, the scope uses an alt-az mount, rather than an equatorial mount. But for me, neither of these were a disadvantage. First, if you’re going to be using an alt-az mount and you’re finding targets using star hopping rather than a go-to mount, then it seems to me that using a diagonal with an upright image is easier and more intuitive to use than a reversing-image diagonal. Second, I think that learning to find targets using star charts and star hopping is a good thing to do and I think that it is easier to do that using an alt-az mount rather than an equatorial mount. Now, on to how this particular scope performed in real life: Unpacking: When I received the shipping box, it looked like it had gone through some pretty rough handling on the way from the seller to me. However, when I opened everything up, it was clear that it had been well cushioned and there was no damage to anything that I could see. Assembly: The only instructions are contained on a laminated picture board that details the steps necessary for assembly. However, the only thing you really have to do is to fit the already assembled optical tube assembly, finder scope and diagonal to the mount. Other than that, everything is already assembled. The only caution I would give you involves the finder scope. In addition to two collimating screws, there’s also a metal spring button that helps to secure the finder scope within its own small tube (which is then attached to the main scope). This metal spring button comes in four small pieces – a small metal canister which is already screwed into the finder-holder tube, a small metal spring, a second canister which slides into the first, and a small screw which holds everything together. In my package, the spring, second canister and screw were all loose in the packaging, so make sure you don’t throw anything away until you’ve found them and assembled them properly. The instructions don’t tell you how to assemble them but when you look at the pictures and see what the purpose of the spring button is you’ll find that there’s only one way that it all works. The second thing to note about the finder scope is that there should be a rubber O-ring near the objective lens side of the finder scope. This O-ring fits in a groove on the finder scope and when the finder scope is inserted into its holder, it needs to be pushed in far enough that this O-ring actually fits inside the holder. This is an important step, because it ensures that the finder scope is securely held in its holder and doesn’t slide around. I saw a You Tube review that complained about a loose finder scope on this scope and it was clear that he had not followed this step, which was the cause of his problem Calibrating the finder scope: In daylight, take the assembled scope outside and insert your lowest powered eyepiece into the diagonal (that’s the 25mm eyepiece). Then aim the scope at a far-away object, center that object in the scope and focus the scope. Then, look through the finder scope. Before you do anything else, focus the finder scope until you get a sharp image of whatever it’s pointed at. You do that by twisting the front barrel of the finder scope. Once it’s focused, turn each set screw in the finder scope separately until the same object that is in the center of your main viewing lens appears in the X crosshairs of the finder scope. If you want to fine-tune it, replace the lens with a higher magnification lens and reset the finder scope. At this point, the finder scope should be good enough to use for the first time. When you use it for the first time at night, you can then calibrate it one more time and, at that point, you shouldn’t have to fiddle with it anymore. I didn’t expect anything special from this finder scope and thought that I would probably have to replace it. I was wrong. It is not flimsy, it appears to have good optics, it is stable and it does exactly what it should do – it enables you to easily find and center your scope on the intended target and then tighten down the telescope so that you can switch to your main eyepiece and be confident that your target will be in the center of your field of view. The quality of the finder scope was a pleasant surprise. The mount: From the pictures online and the specs, the mount certainly seemed sturdy, but the proof is in the pudding – is it sturdy and heavy enough to be stable, does it move smoothly and can it be locked down effectively so that it doesn’t drift? The answer is yes to all three questions. Bear in mind that the scope itself is very light. There is no need to use counterweights with this scope. In any event, the mount was rock solid. It didn’t tremble and it didn’t shake. The legs lock absolutely securely after they’re extended. The mount moves the scope smoothly in all directions and then locks down tight when you’ve centered your target. This is a quality mount. The eyepieces: There is both good news and bad news about the eyepieces (including the 3X Barlow lens). The lowest magnification eyepiece (the 25mm) and the middle magnification eyepiece (the 10mm) both performed fine. Good focus was easily achieved and the view appeared sharp enough for my purposes from edge to edge. The highest magnification eyepiece (the 5mm) was a piece of junk. Even in daylight, views were fuzzy. Using it to look at the moon, or Jupiter, or stars was a waste of time. It would simply not come into focus, no matter what I did. Maybe this was just bad luck with the particular eyepiece that I received, but I won’t be using it. However, another pleasant surprise for me with this scope was the 3X Barlow lens that came with the scope. It is a short lens and it’s entirely made of plastic so that it appears to be pretty flimsy. I’m not a big fan of Barlow lenses to begin with and I didn’t have high hopes for this one. However, when I found that the 5mm eyepiece was useless, I decided to go ahead and try the Barlow lens. Much to my surprise, it not only worked, it worked pretty darn well. Like all Barlow lenses, it darkens the image and it simply magnifies whatever image you’re already receiving with the underlying eyepiece – it doesn’t improve that image. But if you want higher magnification than the 40X provided by the 10mm eyepiece, you can either buy a new eyepiece or you can use the Barlow lens. This Barlow lens is good enough to give you both options. The optical tube assembly (the “OTA”): This is the heart of the scope. I ran it through four tests: First, when I was calibrating the finder scope, I also looked to see how the OTA performed. Second, I used the scope shortly after dusk. While there was some cloud cover and we were expecting rain later that evening, there was a clear view of Jupiter and also of a bright star, Arcturus. But because of high humidity, viewing conditions were not ideal. Third, I got up at 3:30 in the morning and went back out again. By this time, Jupiter was no longer visible, but the half-moon was clearly visible and there were also a large number of stars visible. Between my first viewing and the second one, we had had a good rain, which seemed to clear some of the humidity from the air, resulting in better viewing conditions. Finally, this morning, I used a collimating eyepiece to check the collimation of the OTA. Daylight views were fine, but they’re not much of a test for an astronomical telescope. Suffice it to say that the views were clear and well-focused (except when I used the 5mm eyepiece). My first views of the evening were also good. Using the medium eyepiece (10mm – 40X), I could clearly focus and see Jupiter and four of its moons. I was also able to clearly see two equatorial bands on Jupiter. Clarity was good but not exceptional, probably due to the high humidity. Arcturus resolved clearly. I did not see any color or other aberrations and the view using the two lower-powered eyepieces appeared to be sharp from edge to edge. Just for fun, I also used one of my own wide-field eyepieces, a 40mm eyepiece. It gave a spectacular wide-field view of the stars. That use of the scope is clearly one of its strengths. Finally, I did a rough collimation check by moving the scope slightly out of focus to see if the image remained round and without distortion. It did, suggesting to me that the tube was properly collimated (more on that later). My views later in the evening were even better. The details on the moon were sharp with no color or other aberrations in the view and the stars appropriately resolved to single points of light. I did the same rough collimation check as I did earlier and the results appeared to confirm my original impression that the scope was well collimated. The one point I should mention from both of my evening views is that the contrast is less in this scope than it is in my Takahashi. The Takahashi is a much more expensive scope and the lens coating and scope baffling is top-rate, so the comparison may not be a fair one. Moreover, the contrast in this Chinese-made scope (and most scopes today are probably made in China, even the most well-known brands sold in America) was perfectly fine and didn’t detract from my use or enjoyment of this scope. The buyer should just be aware that he or she shouldn’t expect the same deep contrast you get with more expensive scopes. Finally, after daylight, I used a collimating eyepiece from Orion to check out the collimation of the scope. I’m no expert, but it certainly appeared to me from that test that the scope is spot-on in its collimation. Bottom line conclusions: For my purposes, this is a great scope for the price. It is small and portable (I could easily move the entire scope and mount from place to place using only one hand). It performs very well indeed when used for wide-field views at lower magnifications, but still permits excellent lunar viewing and good planetary viewing. The acid test for me would be to see whether it clearly resolved double stars. I didn’t have the opportunity to try this last night. If and when I do try it with this scope, I’ll try to remember to come back and edit this review to add those results. But I expect that that might prove a challenge for this scope because of the higher magnifications normally required to clearly split doubles. In any event, if you require higher magnifications, you should probably be looking for a different type of scope altogether, but you’ll probably need a much larger and more expensive scope than this one. Also, because this scope doesn’t come with an equatorial mount or a motorized mount, don’t expect to use it for astrophotography. But for a small, portable scope with enough aperture to offer a large number of different viewing experiences, this scope was perfect for my needs. I highly recommend it. I received this scope at a discount for my honest opinion.
01/02/2022
It's a lens cap!
There is not much you can say about a lens cap. This one in particular has no flaws to report.1. It covers the lens2. It is attractive and durable and easy to use3. It says SONY right on the front (no baloney!)
11/10/2021
Related Faq
Q
Does it has a bubble level?
A
Yes. A very small one, but it's there!
Q
hi. will this work with canon r6? thanks
A
Hi, this is filter adapter rings, support use larger or small size filter on your lens , not related with camera brand.
Q
Can I view content directly on the camera
A
Of course, this camera has a small 2-inch screen for easy viewing
Q
Will this work on my sony a6000 and tokina minolta 100-300mm macro zoom?
A
Yes
Q
I tried to remove the lens adaptor and it is stuck to my lens. Can anyone help me with this?
A
The adapter clicks on the lens. It has a small dark gray colored lever (not the white plastic tab to change aperture), level to the outer edge of the bottom ring accessible when removed from the camera, grab the whole adapter with your left hand and push the lever in with your thumb, and while pushing, rotate the lens with your right hand to remove it. You need to push in that lever to unlock the lens.
Related Video
K&F Concept® Lens Mount Adapter for Canon EOS EF mount Lens to GH4
K&F M10101 M42 Lenses to Sony E Lens Mount Adapter
K&F M10111 M42 Lenses to Fuji X Lens Mount Adapter
Small Shade Camera Lens Filter Sony E-mount Too Small Olympus Om Mount Small Lens Pentax K-s2 Lens Mount Small E Mount F2 Lens Small E Mount Lens Small Lens Mount Camera Small Z Mount Lens Sigma 30 F.1.4 Sony A Mount Sony E Mount Small
Nikon Ftz Mount Adaptor Sony To Ef Mount Canon Mount Telephoto Lens Fujifilm S1500 Lens Adapter Zeiss Iphone Lens Adapter Nikon Lens Mount For Celestron Astromaster 114 Sigma Lens Mount Repair Adapter Eos To Nikon Carl Zeiss Nikon Adapter Nikon Mount Video Camera