
Can You Use A Microphone With An Iphone?
Using a microphone with an iPhone is a practical concern for many individuals, whether they're podcasters, musicians, journalists, or simply people looking to improve the audio quality of their phone-based communications and recordings. The iPhone, with its robust software ecosystem, offers a variety of options to accommodate external microphones, making it increasingly capable for professional-grade audio production. In this guide, we will explore the different options available, compatibility requirements, and practical considerations to help you seamlessly integrate an external microphone into your workflow.
Why Use an External Microphone with an iPhone?
While iPhones are equipped with built-in microphones that perform adequately for casual use, these microphones often fall short in situations requiring high-quality audio capture. Using an external microphone can drastically improve sound clarity, reduce background noise, and provide finer control over audio levels. Whether you're recording a podcast, conducting interviews, or capturing a live performance, an external microphone is a valuable tool for enhancing sound quality and meeting professional standards.
Types of External Microphones Compatible with an iPhone

There is a wide variety of external microphones available, and understanding your specific use case will help you make the best choice. Here are some common types of microphones and their characteristics:
1. Lavalier Microphones:
Lavalier microphones are small clip-on microphones typically used for interviews, presentations, or video production. They are convenient for situations requiring hands-free operation and are ideal for recording vocals. Some lavalier microphones designed with TRRS connectors or Lightning adapters are directly compatible with iPhones.
2. Shotgun Microphones:
Shotgun microphones are directional microphones that capture audio from the direction in which they are pointed while minimizing ambient noise. They are a preferred choice for filmmakers and YouTubers who need crisp, focused audio during video recording.
3. USB Microphones:
USB microphones can be used with iPhones via an additional adapter, such as Apple's Lightning to USB Camera Adapter. These microphones are favored for studio-quality recordings, including podcasts or voiceovers.
4. Condenser Microphones:
Condenser microphones generally offer high sensitivity and a wide dynamic range, making them an excellent choice for music production. Like USB microphones, they require an adapter to connect to iPhone devices.
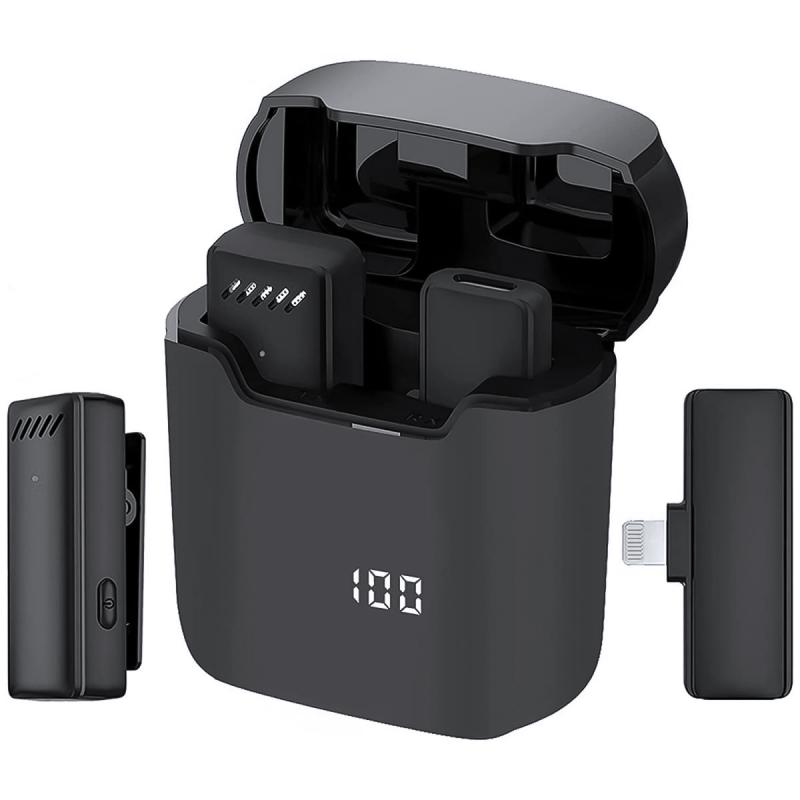
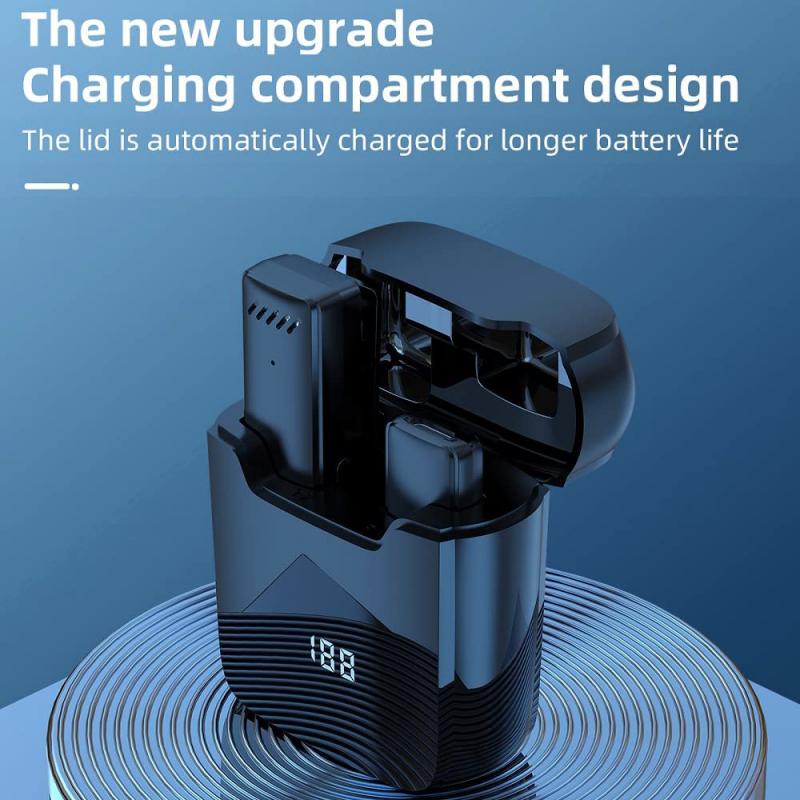
5. Wireless Microphones:
Wireless systems are ideal for those who value mobility, as they eliminate the need for cables. These systems often use Bluetooth or a dedicated receiver that connects to the iPhone’s Lightning port.
6. Professional Audio Interfaces:
For high-end applications, such as music production or broadcasting, you might want to use an audio interface to connect professional XLR microphones to your iPhone. These interfaces manage signal processing and provide the necessary connection between professional-grade microphones and the iPhone.
Connecting a Microphone to Your iPhone
Depending on the microphone type, connecting it to your iPhone can involve different steps. Below are the most common connection methods:
1. TRRS Connection:
Many microphones feature a 3.5mm TRRS jack designed to plug directly into the headphone port of older iPhone models. If your iPhone lacks a headphone jack (models from iPhone 7 onward), you'll need a Lightning-to-headphone adapter to facilitate this connection.
2. Lightning Connector:
Some microphones come with a built-in Lightning connector for direct compatibility with modern iPhone models. These microphones are highly convenient as they don’t require additional adapters.
3. USB Connection:
USB microphones require a Lightning to USB Camera Adapter that functions as an intermediary. Once connected, the microphone can be used in apps that support external audio input, such as GarageBand or Voice Memos.
4. Wireless Receiver:
Wireless microphone systems usually come with a receiver that connects to the iPhone via its Lightning port. Check for devices that support your wireless system for optimal functionality.
5. Audio Interfaces:
If you're using a professional microphone with an XLR connection, you’ll need an audio interface. This interface uses a USB or dedicated Lightning output to connect to the iPhone and ensures proper audio signal processing.
Choosing the Right Microphone for Your Needs
Selecting the right microphone should be based on your intended use. Below are some typical scenarios and microphone recommendations:
1. Podcasts and Interviews:
For spoken word applications, lavalier or USB microphones work exceptionally well due to their vocal clarity and ease of use.
2. Music Recording:
Condenser microphones are a great fit for capturing vocals and instruments with high fidelity. Use them with an audio interface for optimal results.
3. Filmmaking:
Shotgun microphones are the preferred choice for video production, as they isolate sound coming from the subject of focus and avoid interference from surroundings.
4. Live Streams and Vlogs:
Lavalier microphones or Lightning-equipped microphones provide mobility and convenience, making them ideal for live-streaming scenarios.
5. Travel Filmmaking:
Wireless microphones reduce the burden of carrying and managing cables and are well-suited for on-the-go video production.
Applications and Settings for External Microphones
Once you've connected your microphone, knowing how to maximize its potential is key. Many apps used for recording or editing audio allow you to define microphone input settings. Here's how to get started:
Voice Memos App:
The simplest way to record audio on your iPhone is via the built-in Voice Memos app. Connect the external microphone, open the app, and start recording. The app automatically defaults to the external microphone if properly connected.
GarageBand:
For more advanced audio recording and editing, GarageBand offers robust features for musicians and podcasters. You can customize input settings and monitor recordings in real-time through headphones.
Filmic Pro (for Video):
For video recording, Filmic Pro provides enhanced manual controls that include microphone input settings, making it easier to match audio and video quality.
Troubleshooting Common Issues
Using external microphones with an iPhone may come with occasional challenges. Below are some common issues and solutions:
1. Microphone Not Recognized:
Ensure your microphone is compatible with the iPhone’s Lightning port or adapter. Double-check the connection and restart your phone if needed.
2. Low Audio Quality:
Poor sound quality can result from improper settings or incompatible microphones. Ensure the microphone settings match your desired application and check for damage to cables or connectors.
3. Static or Background Noise:
External noise could stem from the environment or electrical interference. Use a pop filter or noise-canceling microphone to reduce this issue.
4. App Issues:
Not all apps support external microphones. Verify application compatibility and use apps that are specifically designed for external audio inputs.
Using an external microphone with an iPhone opens up a world of possibilities for enhancing sound quality in recordings, streaming, and professional productions. With options ranging from USB microphones to wireless systems and professional audio interfaces, there is a solution available for every use case. By understanding compatibility requirements and mastering the setup process, users can effortlessly integrate a microphone with their iPhone, ensuring superior audio performance.
Whether you’re a casual content creator or a seasoned professional, making the right choice of microphone and optimizing it within your workflow can turn your iPhone into a fully-functional mobile audio recording studio. So explore your options, evaluate your needs, and start maximizing the potential of your iPhone for high-quality audio production today!


 + 4in1 DSLR Camera Cleaning Kit")


