kfconcept

KENTFAITH
K&F Concept    Blog >

Enjoy Your Selected Digital Life

Recently Viewed
  • Recently Viewed
  • Recently Viewed list is empty.

Compare (0) 0
  • Compare
  • You have not chosen any products to compare.

  • Compare
Currency: USD
  • Currency
Shop by Scene Shop by Rank

Log Into Your Account

Account

Order History

Wish List

Login

Forgotten Password?

or connect with

Register Account

Already have an Account?Log In

  • Shopping Cart
  • Your shopping cart is empty!

  • Register/Login to purchase, earn points
  • Favorite
  • Your wish list is empty.

  • Register/Login to like, earn points
  • Activities
  • Guide
    • Filter Guide
    • Lens Adapter
    • Product Review
  • News & Reviews
    • Camera Reviews
    • Sample Gallery
    • News
  • Tutorials
    • Solar eclipse photography
    • Photography Basics
    • Landscape Photography
  • Inspiration
    • Travel
    • Travel Stories
  • Home
  • Blog
  • How To Take Pictures Of Microscope Slide?

How To Take Pictures Of Microscope Slide?

Kentfaith 2026-08-15 00:59:57 0 Comments

Photomicrography – the process of taking photographs with the microscope – used to be a highly-specialised skill taking many years of practice to achieve good results. Digital cameras have largely changed that, as the instant viewing of results allows errors to be corrected immediately. This introduction helps those with limited skills or confidence to get started in photomicrography, which can now be performed at relatively low cost and with minimal equipment.

Setting Up the Microscope for Even Illumination

Good microscope technique is the essential starting point to taking good photomicrographs. With the compound microscope, the aims in setting up the microscope are to achieve even illumination and an acceptable level of contrast with the subject; the human eye can correct for a lot of defects automatically which the digital camera faithfully records.

Setting up Köhler illumination, the standard method for achieving even illumination, is described in most microscope manuals:

  1. Focus on the specimen with both the substage condenser iris and the field lens iris (the one closest to the lamp) open.
  2. Partially close the field iris and focus the condenser down from its top position until the edges of the field iris are sharply focused in the same field as the specimen.
  3. Open the field iris until its perimeter is just outside the field of view.
  4. Remove one eyepiece and, looking down the eyetube, partially close the condenser iris until it blocks approximately one quarter to one third of the field of view. This is the optimum setting for contrast in brightfield conditions.

Note that some simpler (but still perfectly capable) microscopes do not have a field iris; in this situation a ground glass filter is usually present close to the bulb to diffuse the illumination.

how to take pictures of microscope slide 1

Achieving Contrast with Different Illumination Methods

Achieving good contrast with many subjects is important to produce good results. Brightfield conditions can work well if the subject is of high contrast. However, many organisms are very transparent and subsequently of low contrast.

Darkground Illumination
Darkground is achieved either by use of a special darkground condenser (usually a cardioid mirror) or (for objectives up to ×40) with a patch stop in the condenser filter tray. If you have a phase contrast condenser, the phase ring for a higher magnification objective often works well as a darkground stop.
Rheinberg Illumination
Rheinberg illumination can produce beautifully coloured images, with the background one colour and the subject in a contrasting colour. It is achieved using a filter with an inner circle of one colour (forming the background) and an outer ring of the complementary colour.
Phase Contrast
Phase contrast is a widely-available system for increasing contrast but does require some adjustment to get the best results.
Differential Interference Contrast (DIC / Nomarski)
For the well-funded, differential interference contrast provides superb contrast – but at a price.
how to take pictures of microscope slide 2

Choice of Camera and Coupling to the Microscope

Often the choice of camera is already determined by what is already available. The easiest route is certainly a camera with a removable lens – typically a DSLR camera. More recent models have tilting viewing screens which can help with framing and focusing, but the best solution if the camera is capable is to use 'tethered' shooting, driving the camera and viewing the image directly from a computer via a USB lead. Canon cameras in particular are very easy to use in this respect.

Both the microscope and camera need suitable fittings for the two to be coupled together:

  • With compound microscopes, the easiest option is to use a trinocular tube (providing binocular tubes for viewing and a third vertical tube for permanent attachment of the camera). Trinocular tubes contain a prism that diverts either all or some of the light to the camera.
  • A much lower cost solution, fine for occasional photography, is a simple vertical monocular tube that replaces the normal angled viewing head.
  • It is possible to couple a camera directly onto one of the angled eyepiece tubes of a binocular head as a temporary set-up; heavier cameras make this more difficult and a stable (heavy) microscope is required.
  • With stereomicroscopes, stereos can be supplied or fitted with trinocular heads but these are expensive and hard to find second-hand, whilst the eyepiece tubes are generally of wider diameter (e.g. 30 mm) and do not fit the widely-available microscope to camera adapters.
  • The camera will need a microscope adapter to connect to the microscope tube.

A C-mount adapter is a camera adapter that is specifically made for your microscope. When selecting a C-mount adapter, take into consideration the eyepiece magnification as well as the camera chip size. Also keep in mind that a microscope provides a circular image, while a camera has a rectangular sensor, so you will not see exactly the same size image you see through the eyepieces. Use the chart below to find the correct C-mount adapter based on the chip size in the camera:

  • 1/4" chip size — 0.3x C-mount adapter
  • 1/3" chip size — 0.3x C-mount adapter
  • 1/2" chip size — 0.45x or 0.5x C-mount adapter
  • 1/1.8" chip size — 0.5x or 0.6x C-mount adapter
  • 2/3" chip size — 0.7x C-mount adapter
  • 1" chip size — 1x C-mount adapter

how to take pictures of microscope slide 3

Eyepiece Selection for Photography

A normal viewing eyepiece can be used but will require the microscope to be significantly defocused to achieve focus at the camera. This can often be reduced or eliminated by slightly raising the eyepiece in its tube by about 5 mm with a card or paper collar; some experimentation will be needed to find the most amenable eyepiece and its best position. If available, choose a lower power eyepiece to achieve a wider field of view on the camera. Specialist photographic eyepieces, usually of low power, are also available; the Olympus versions work well in most circumstances and are often available second-hand.
how to take pictures of microscope slide 4

Taking the Photograph

Stationary subjects are much easier to cope with. Water fleas can be killed easily or narcotised with Boots brand anaesthetic throat spray (containing lidocaine). The camera, with lens removed, should be set to shutter speed control (or fully manual) and typically set around 1/15 of a second to start with. Film speed (if selectable) should be set to a low ASA e.g. 100 or 200 and white balance to automatic.

The big issue in taking a photomicrograph is preventing vibration from the camera mirror, which is magnified by the microscope and results in 'blurry' images. Many DSLRs have a 'mirror lock' option in their menus, or the mirror will already be up if shooting from 'live view' mode (which makes framing and focus much easier). Even now, the process of touching the shutter button will cause vibration and must be avoided. The options are either to use an electronic shutter release cable, or to use camera software to 'fire' the camera from a computer.

Using a Phone Camera at the Eyepiece

It is possible to use a phone camera to take pictures through a microscope. Some photos taken this way are even publishable quality. Yes, but usually the photos won't be of high quality, and they are really hard to get.

To use an iPhone or similar phone camera at the eyepiece:

  1. Put the phone lens directly on the eyepiece. You can usually see a small circle of the specimen.
  2. Tap and hold (on iPhone) to lock the focus.
  3. Readjust and move the phone away a little to get a wider field of view — the focus will stay in place.
  4. Take about a million pictures in a row to make up for how much your hands are shaking.

To stabilise the camera, try bracing your elbows on the table or resting your fingers over the eyepiece. Another technique: rest your pinky finger on the side of the eyepiece to stabilise the camera. Hold the camera maybe 3–4 inches away from the eyepiece while resting the pinky finger on the left eyepiece, and try to catch the 'light' from the eyepiece — it will appear as a small circle. Once you catch it, lower your camera nearer to the eyepiece while maintaining focus on the small circle, until the field comes into view. Never remove your pinky finger while doing this. Takes some practice but once you get the hang of it it becomes easy. There is also a company that sells a phone holding device to affix phones to a microscope eyepiece reproducibly.

Reviewing Results and Correcting Common Defects

The great magic of digital photography is that results can be viewed immediately and defects corrected. Common problems include:

Dirt in the field of view
The usual locations for dirt are the top lens of the condenser and the top of the eyepiece. Condenser dirt can be detected (and eliminated from the photo) by slightly defocusing (lowering) the condenser. In both instances clean with a blower brush and lens cleaning solution.
Uneven illumination
Problems here can be difficult to detect as there are several possible causes. Check firstly that the microscope is set up correctly and that the condenser filter tray has not been pushed partially across the illumination path. Other problems may be caused by a non-aligned component of the microscope (such as the condenser). The eyepiece used to project the image to the camera may also be a cause of 'flare' – trial and error with different eyepieces may be needed.
'Grainy' appearance
Results from having the condenser iris closed down excessively. Open it to no more than one third of the aperture of the objective when looking down an eyetube with the eyepiece removed.

Like most skills, perfection comes with practice, and at least with digital cameras trial and error costs nothing.
Leave your comment
Cancel reply
Note: HTML is not translated!
Related products
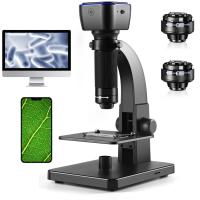
50X-2000X Digital Microscope, 500W Pixel, HD Visual WiFi Digital Microscope, Portable Microscope
67
$151.19 $129.99
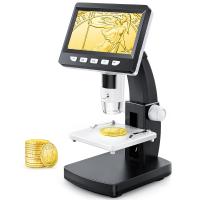
4.3” LCD Digital Microscope for Kids, 50X-1000X Magnification, USB Microscope
79
$107.99 $68.99
7" LCD Screen Digital Microscope, 1080P 50x-2000X Magnification Biological Microscope, with Dual Lenses
HOT Seller
7" LCD Screen Digital Microscope, 1080P 50x-2000X Magnification Biological Microscope, with Dual Lenses
89
$191.99 $189.99
Digital Mini Microscope for Kids, 100x-1000x Handheld Microscope with 32GB SD Card & Battery
32
$92.99 $65.99
Compound Microscope for Kids with 4.3in Screen, 80X to 800X, WiFi Connection, Dual Light Sources, 1080P Videos, 32GB Card Included, Kentfaith
12
$237.49 $189.99
Optical Microscope for Adults Students, 40X-2000X Magnification, Dual LED Illumination, High-Power Scientific Portable HD Microscope
70
$203.99 $149.99
Digital Microscope with 10.1" Screen & 3 Lenses, 1000X, 1500X, 2500X for Coin, Soldering, Electronics Repair, Biology, Kentfaith Microscope
79
$362.49 $299.99
DM9 7" LCD Digital Microscope 10X-1200X, 1080P Coin Microscope with 12MP Camera Sensor Work with Windows/Mac OS
HOT Seller
DM9 7" LCD Digital Microscope 10X-1200X, 1080P Coin Microscope with 12MP Camera Sensor Work with Windows/Mac OS
118
$149.99 $121.99
Digital Microscope with 9" LCD Screen, 1000X Magnification Coin Microscope with 12MP Camera for Adults, Work with Windows/Mac OS
HOT Seller
Digital Microscope with 9" LCD Screen, 1000X Magnification Coin Microscope with 12MP Camera for Adults, Work with Windows/Mac OS
45
$215.99 $167.99
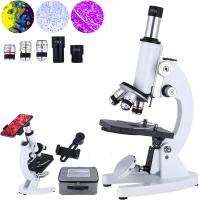
40X-5000X Portable Optical Microscope for Schools, Students, Beginners, Kentfaith Compound Microscope with 4X, 10X, 100X Eyepieces, Phone Holder, Fill Light
286
$160.79 $119.99
Products You May Like
43mm Circular Polarizing Filter Ultra-Thin Trapezoidal Frame  Blue-Coated Film with a Piece of Vacuum Cleaning Cloth CPL Filter Nano-Klear Series
43mm Circular Polarizing Filter Ultra-Thin Trapezoidal Frame Blue-Coated Film with a Piece of Vacuum Cleaning Cloth CPL Filter Nano-Klear Series
62
$19.99 $16.99
82mm Magnetic Lens Filter Kit GND8 + ND8 + ND64 + ND1000 + Magnetic Adapter Ring 5 in 1 Quick Swap System Nano-Xcel Series
84
$212.99 $171.99
77mm Blue Streak Filter (2mm) Optical Glass Ultra-clear Waterproof Anti-Scratch Anti-Reflection Green Film Nano-Xcel Series
42
$92.99 $61.99
Silicone Non-Slip Desktop Mount for DJI Osmo Pocket 3, Lightweight and Compact, OSMO Pocket 3 Accessories
NEW Arrival
Silicone Non-Slip Desktop Mount for DJI Osmo Pocket 3, Lightweight and Compact, OSMO Pocket 3 Accessories
24
$7.99
FD to E Mount Lens Mount Adapter Comaptible for Canon FD FL Mount Lens to E NEX Mount Mirrorless Cameras with Matting Varnish Design Comaptible for Sony A6000 A6400 A7II A5100 A7 A7RIII
147
$56.99 $33.99
Mini Pocket LED Projector 1080P Full HD Work With TV Stick (UK Plug)
27
$57.99
Camera Neck Strap Camera Shoulder Strap Suitable for DSLR SLR Cameras Strap Urban Wander 05 Black+White
96
$12.99
67mm Clip-on CPL Phone Camera Lens Filter Kit Applicable to All Mobile Phone Models
40
$18.99
K&F Concept SN25T ND1000 Square Filter 100x100mm + Metal Holder + 8pcs Adapter Rings For DSLR
33
$102.99 $51.99
K&F Concept 2 in 1 Sling Bag Everyday Shoulder Bag & Multifunction Photography Crossbody Camera DSLR Backpack Portable Bag - Sling Bag 10L Urban Wander 01 (Red)
NEW Arrival
K&F Concept 2 in 1 Sling Bag Everyday Shoulder Bag & Multifunction Photography Crossbody Camera DSLR Backpack Portable Bag - Sling Bag 10L Urban Wander 01 (Red)
132
$49.99 $39.99
Related articles
How Take Pictures Nd Filter?
How To Take Pictures Through A Telescope?
Telescope That Can Take Pictures?
Can Action Cameras Take Pictures?
Where Does The Slide Go On A Microscope?
Baby Cameras That Can Take Pictures?
Can You Get Binoculars That Take Pictures?
Can I Take Pictures Without A Memory Card?
What Is The Field Of View Microscope?
Professional Photographers Use What Camera Strap?
Blog You May Like
How To Access Wifi Camera Away From Home ?
How To Adjust Scope For Range?
How Secure Are Wifi Cameras?
unsure your lens mount?
How To Record Audio From A Video?
How To Capture Video On Pc From Camcorder?
How To Pick Binoculars For Bird Watching?
Can I Track Security Cameras Using Cellular?
What Size Memory Card For Nikon D7000?
Why Are My Beats Headphones Blinking White ?
Related categories
C mount lens adapter m4/3 adapter digital microscope Nikon Z mount adapter Square Filter Kit camera lens uv filter lens CPL filter
Popular products
quadcopter drone with camera binoculars night and day compound microscope with digital camera digital microscope 2000x bluedio wireless bluetooth headphones microscope with usb camera microscope with led screen digital microscope for repair LCD Digital Microscope led lighted pocket microscope
Related searches
4x Microscope Field Of View Cost Of A Light Microscope Electron Microscope Range Of Magnification Types Of Compound Light Microscope Field Of View Microscope 400x The Objective Lens Of A Microscope Power Of Objective Lens On Microscope Nikon Dslr Slide Adapter Good Camera For Both Pictures And Video Canon Fp-100 Slide Adapter
Related Scenes
Best Camera For Taking Pictures Of Kids Best Camera To Video Sports Best Camera To Capture Wildlife Best Tripod To Travel With Best Video Camera To Record Sports Best Camera Filter To Reduce Blue Best Camera For Action Pictures Best Camera For Outdoor Pictures Best Digital Camera For Pictures Best Mini Digital Camera
Blog Category
  • Activities
  • Guide
    • Filter Guide
    • Lens Adapter
    • Product Review
  • News & Reviews
    • Camera Reviews
    • Sample Gallery
    • News
  • Tutorials
    • Solar eclipse photography
    • Photography Basics
    • Landscape Photography
  • Inspiration
    • Travel
    • Travel Stories
Search Article
Latest from the Blog
What Is The Eyepiece Power Of Your Microscope?
Can Headphones Work As A Microphone?
How Does Magnification Work On A Microscope?
Which Headphones Is Best Wired Or Wireless?
Can You Have Security Cameras Without Wifi?
How To Have More Bass In Headphones?
What Hifi Noise Cancelling Headphones?
What Is The Best Rangefinder For 1000 Yards?
How To Make A Wired Security Camera Wireless?
What Is The Digital Camera Used For?
  • Easy Payment Multilple Payment Options

  • Free Shipping Global WareHouse Shipment

  • No Risk 30-Day No Reason Return

  • Limited Deals Buy More, Save More

  • Tax Free No any surcharges or tax fee

Information
  • About us
  • Contact Us
  • Site Map
  • Blog
  • Video
  • Gallery
  • VIP Membership Rewards
Service
  • Privacy Policy
  • Terms & Conditions
  • Shipping & Delivery
  • Payment Info
  • Warranty, Return & Refund
  • Intellectual Property Rights
  • Ambassador
  • Affiliates
  • Wholesale
Support
  • My account
  • Order History
  • FAQs
  • Extend Warranty
  • Logistics Tracking
Follow us
NewsLetter

Get the latest product, K&F Concept respects your privacy.
Powered By KENTFAITH © 2026