How To Take Pictures Of Microscope Slide?
Photomicrography – the process of taking photographs with the microscope – used to be a highly-specialised skill taking many years of practice to achieve good results. Digital cameras have largely changed that, as the instant viewing of results allows errors to be corrected immediately. This introduction helps those with limited skills or confidence to get started in photomicrography, which can now be performed at relatively low cost and with minimal equipment.
Setting Up the Microscope for Even Illumination
Good microscope technique is the essential starting point to taking good photomicrographs. With the compound microscope, the aims in setting up the microscope are to achieve even illumination and an acceptable level of contrast with the subject; the human eye can correct for a lot of defects automatically which the digital camera faithfully records.
Setting up Köhler illumination, the standard method for achieving even illumination, is described in most microscope manuals:
- Focus on the specimen with both the substage condenser iris and the field lens iris (the one closest to the lamp) open.
- Partially close the field iris and focus the condenser down from its top position until the edges of the field iris are sharply focused in the same field as the specimen.
- Open the field iris until its perimeter is just outside the field of view.
- Remove one eyepiece and, looking down the eyetube, partially close the condenser iris until it blocks approximately one quarter to one third of the field of view. This is the optimum setting for contrast in brightfield conditions.
Note that some simpler (but still perfectly capable) microscopes do not have a field iris; in this situation a ground glass filter is usually present close to the bulb to diffuse the illumination.

Achieving Contrast with Different Illumination Methods
Achieving good contrast with many subjects is important to produce good results. Brightfield conditions can work well if the subject is of high contrast. However, many organisms are very transparent and subsequently of low contrast.
- Darkground Illumination
- Darkground is achieved either by use of a special darkground condenser (usually a cardioid mirror) or (for objectives up to ×40) with a patch stop in the condenser filter tray. If you have a phase contrast condenser, the phase ring for a higher magnification objective often works well as a darkground stop.
- Rheinberg Illumination
- Rheinberg illumination can produce beautifully coloured images, with the background one colour and the subject in a contrasting colour. It is achieved using a filter with an inner circle of one colour (forming the background) and an outer ring of the complementary colour.
- Phase Contrast
- Phase contrast is a widely-available system for increasing contrast but does require some adjustment to get the best results.
- Differential Interference Contrast (DIC / Nomarski)
- For the well-funded, differential interference contrast provides superb contrast – but at a price.
Choice of Camera and Coupling to the Microscope
Often the choice of camera is already determined by what is already available. The easiest route is certainly a camera with a removable lens – typically a DSLR camera. More recent models have tilting viewing screens which can help with framing and focusing, but the best solution if the camera is capable is to use 'tethered' shooting, driving the camera and viewing the image directly from a computer via a USB lead. Canon cameras in particular are very easy to use in this respect.
Both the microscope and camera need suitable fittings for the two to be coupled together:
- With compound microscopes, the easiest option is to use a trinocular tube (providing binocular tubes for viewing and a third vertical tube for permanent attachment of the camera). Trinocular tubes contain a prism that diverts either all or some of the light to the camera.
- A much lower cost solution, fine for occasional photography, is a simple vertical monocular tube that replaces the normal angled viewing head.
- It is possible to couple a camera directly onto one of the angled eyepiece tubes of a binocular head as a temporary set-up; heavier cameras make this more difficult and a stable (heavy) microscope is required.
- With stereomicroscopes, stereos can be supplied or fitted with trinocular heads but these are expensive and hard to find second-hand, whilst the eyepiece tubes are generally of wider diameter (e.g. 30 mm) and do not fit the widely-available microscope to camera adapters.
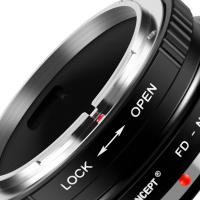
- The camera will need a microscope adapter to connect to the microscope tube.
A C-mount adapter is a camera adapter that is specifically made for your microscope. When selecting a C-mount adapter, take into consideration the eyepiece magnification as well as the camera chip size. Also keep in mind that a microscope provides a circular image, while a camera has a rectangular sensor, so you will not see exactly the same size image you see through the eyepieces. Use the chart below to find the correct C-mount adapter based on the chip size in the camera:
- 1/4" chip size — 0.3x C-mount adapter
- 1/3" chip size — 0.3x C-mount adapter
- 1/2" chip size — 0.45x or 0.5x C-mount adapter
- 1/1.8" chip size — 0.5x or 0.6x C-mount adapter
- 2/3" chip size — 0.7x C-mount adapter
- 1" chip size — 1x C-mount adapter
Eyepiece Selection for Photography
A normal viewing eyepiece can be used but will require the microscope to be significantly defocused to achieve focus at the camera. This can often be reduced or eliminated by slightly raising the eyepiece in its tube by about 5 mm with a card or paper collar; some experimentation will be needed to find the most amenable eyepiece and its best position. If available, choose a lower power eyepiece to achieve a wider field of view on the camera. Specialist photographic eyepieces, usually of low power, are also available; the Olympus versions work well in most circumstances and are often available second-hand.
Taking the Photograph
Stationary subjects are much easier to cope with. Water fleas can be killed easily or narcotised with Boots brand anaesthetic throat spray (containing lidocaine). The camera, with lens removed, should be set to shutter speed control (or fully manual) and typically set around 1/15 of a second to start with. Film speed (if selectable) should be set to a low ASA e.g. 100 or 200 and white balance to automatic.
The big issue in taking a photomicrograph is preventing vibration from the camera mirror, which is magnified by the microscope and results in 'blurry' images. Many DSLRs have a 'mirror lock' option in their menus, or the mirror will already be up if shooting from 'live view' mode (which makes framing and focus much easier). Even now, the process of touching the shutter button will cause vibration and must be avoided. The options are either to use an electronic shutter release cable, or to use camera software to 'fire' the camera from a computer.
Using a Phone Camera at the Eyepiece
It is possible to use a phone camera to take pictures through a microscope. Some photos taken this way are even publishable quality. Yes, but usually the photos won't be of high quality, and they are really hard to get.
To use an iPhone or similar phone camera at the eyepiece:
- Put the phone lens directly on the eyepiece. You can usually see a small circle of the specimen.
- Tap and hold (on iPhone) to lock the focus.
- Readjust and move the phone away a little to get a wider field of view — the focus will stay in place.
- Take about a million pictures in a row to make up for how much your hands are shaking.
To stabilise the camera, try bracing your elbows on the table or resting your fingers over the eyepiece. Another technique: rest your pinky finger on the side of the eyepiece to stabilise the camera. Hold the camera maybe 3–4 inches away from the eyepiece while resting the pinky finger on the left eyepiece, and try to catch the 'light' from the eyepiece — it will appear as a small circle. Once you catch it, lower your camera nearer to the eyepiece while maintaining focus on the small circle, until the field comes into view. Never remove your pinky finger while doing this. Takes some practice but once you get the hang of it it becomes easy. There is also a company that sells a phone holding device to affix phones to a microscope eyepiece reproducibly.
Reviewing Results and Correcting Common Defects
The great magic of digital photography is that results can be viewed immediately and defects corrected. Common problems include:
- Dirt in the field of view
- The usual locations for dirt are the top lens of the condenser and the top of the eyepiece. Condenser dirt can be detected (and eliminated from the photo) by slightly defocusing (lowering) the condenser. In both instances clean with a blower brush and lens cleaning solution.
- Uneven illumination
- Problems here can be difficult to detect as there are several possible causes. Check firstly that the microscope is set up correctly and that the condenser filter tray has not been pushed partially across the illumination path. Other problems may be caused by a non-aligned component of the microscope (such as the condenser). The eyepiece used to project the image to the camera may also be a cause of 'flare' – trial and error with different eyepieces may be needed.
- 'Grainy' appearance
- Results from having the condenser iris closed down excessively. Open it to no more than one third of the aperture of the objective when looking down an eyetube with the eyepiece removed.
Like most skills, perfection comes with practice, and at least with digital cameras trial and error costs nothing.