
How Use Ring Light?
Mastering the Use of a Ring Light: A Comprehensive Guide
In the world of photography, videography, and content creation, lighting is everything. It can make or break the quality of your work, and one of the most versatile tools in this domain is the ring light. Whether you're a professional photographer, a beauty vlogger, or someone who simply wants to elevate their Zoom calls, a ring light can be your best friend. But how do you use it effectively? In this article, we’ll explore the ins and outs of using a ring light, from setup to advanced tips, to help you achieve the best results.
---
What is a Ring Light?
Before diving into the "how," let’s briefly discuss the "what." A ring light is a circular lighting device that provides even, diffused light. Its design minimizes shadows and creates a flattering, soft glow, making it ideal for close-up photography, makeup tutorials, and video calls. The hollow center allows you to position your camera or smartphone in the middle, ensuring the light is evenly distributed around your subject.
---
Why Use a Ring Light?
The popularity of ring lights stems from their versatility and ease of use. Here are some key benefits:
1. Even Lighting: Ring lights reduce harsh shadows, making them perfect for portraits and close-ups.
2. Catchlight Effect: They create a unique circular reflection in the eyes, adding a professional touch to portraits.
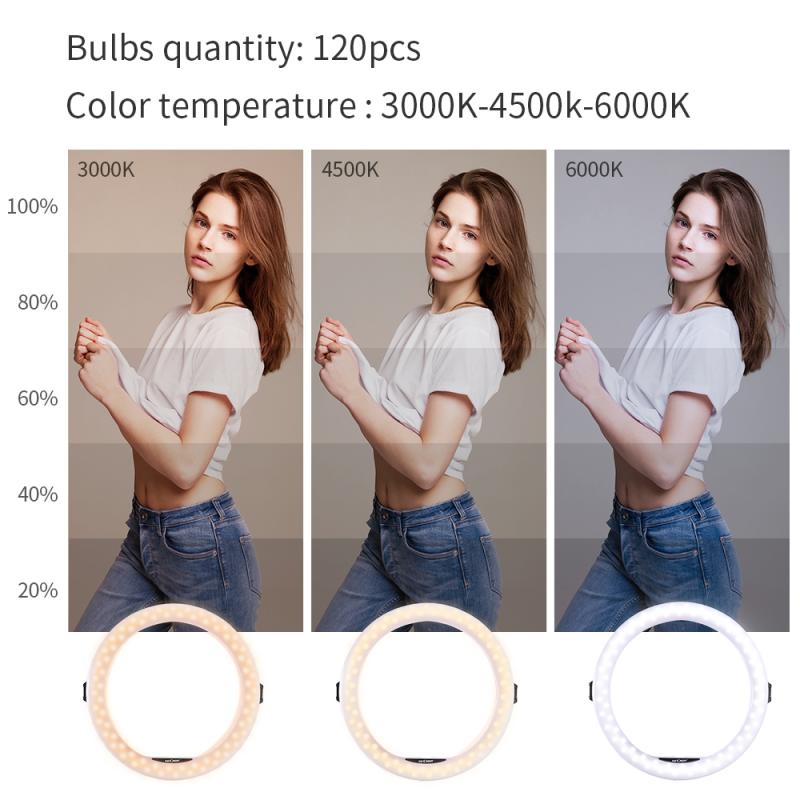
3. Adjustable Brightness and Color Temperature: Many ring lights allow you to control the intensity and warmth of the light, making them adaptable to various settings.
4. Compact and Portable: Unlike bulky studio lights, ring lights are lightweight and easy to set up, making them ideal for on-the-go creators.
---
Step-by-Step Guide to Using a Ring Light

1. Choose the Right Ring Light for Your Needs
- Size: Ring lights come in various sizes, typically ranging from 6 inches to 18 inches in diameter. Smaller lights are great for selfies and desk setups, while larger ones are better for full-body shots or professional photography.
- Features: Look for adjustable brightness, color temperature settings, and compatibility with your camera or smartphone.
- Power Source: Some ring lights are USB-powered, while others require an electrical outlet. Choose one that suits your workspace.
2. Set Up the Ring Light
- Positioning: Place the ring light on its stand and adjust the height to match your subject. For portraits or videos, the light should be at eye level.
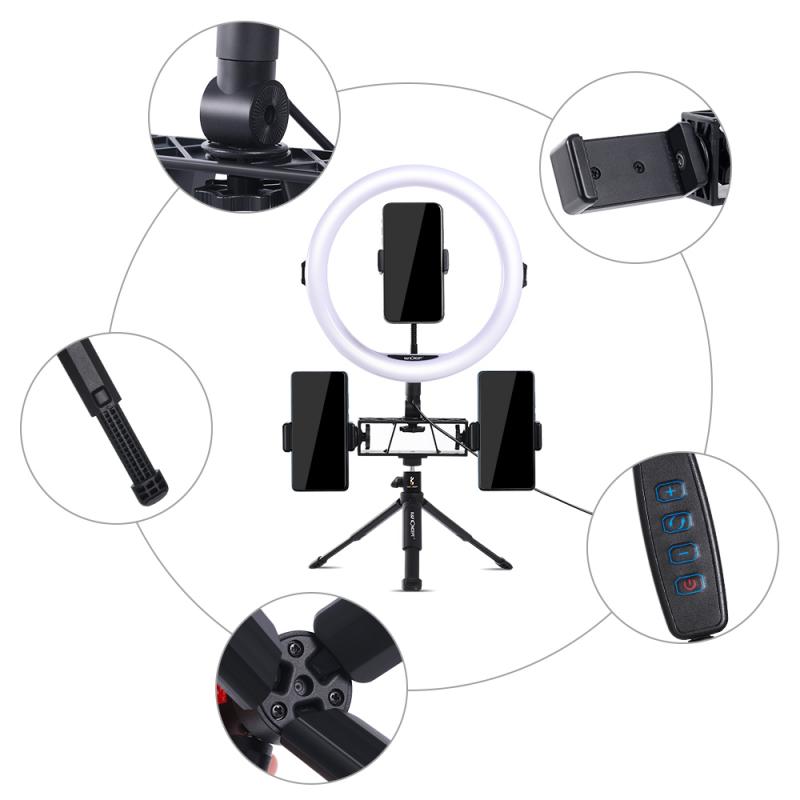
- Camera Placement: Most ring lights come with a mount for your camera or smartphone. Position your device in the center of the ring for optimal lighting.
- Distance: The ideal distance between the ring light and your subject is usually 1-2 feet. Too close, and the light may be too harsh; too far, and it may lose its effect.
3. Adjust the Settings
- Brightness: Start with a medium brightness level and adjust as needed. Too much light can wash out your subject, while too little can result in poor visibility.
- Color Temperature: Many ring lights offer settings ranging from warm (yellowish) to cool (bluish) tones. Use warmer tones for a cozy, natural look and cooler tones for a crisp, professional appearance.
4. Test the Lighting
- Take a few test shots or record a short video to see how the lighting looks. Adjust the angle, brightness, and color temperature until you achieve the desired effect.
- Pay attention to shadows and reflections. If you notice unwanted glare, try repositioning the light or using a diffuser.
5. Enhance Your Setup
- Background: A clean, uncluttered background complements the even lighting provided by the ring light.
- Additional Lights: While a ring light is often sufficient on its own, you can use additional lights for a more dynamic setup. For example, a backlight can add depth to your shots.
---
Tips for Specific Use Cases
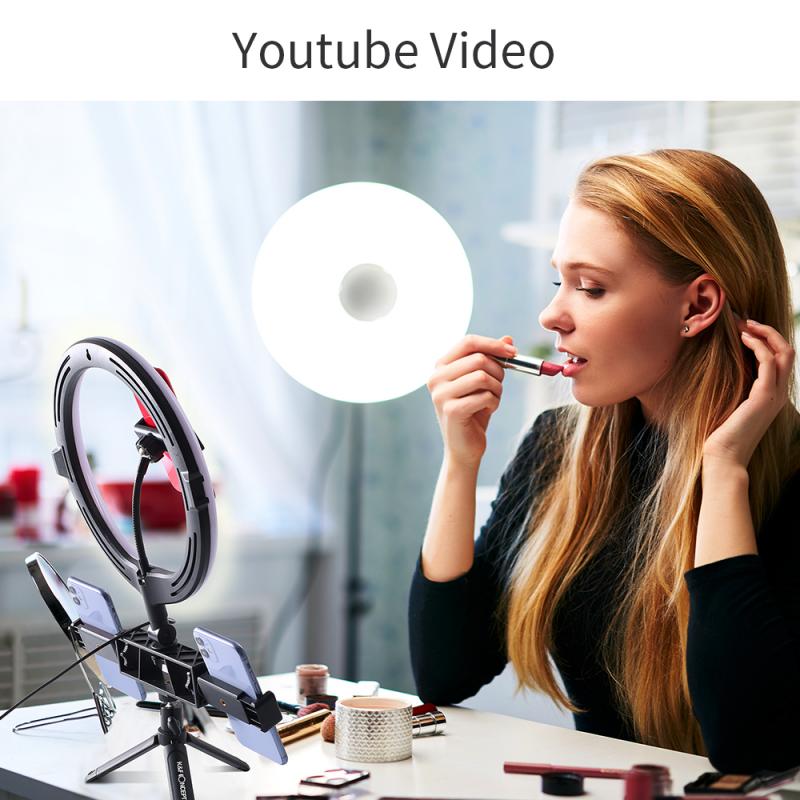
For Makeup Tutorials
- Position the ring light directly in front of your face to ensure even lighting.
- Use a mirror with a stand so you can see yourself while filming.
- Opt for a ring light with adjustable color temperature to match the lighting in your room.
For Photography
- Experiment with angles. While the traditional setup involves placing the ring light directly in front of the subject, you can also try side lighting for a more dramatic effect.
- Use the catchlight effect to make your subject’s eyes pop. Ensure the ring light is positioned at eye level for the best results.
For Video Calls
- Place the ring light slightly above eye level and angle it downward for a flattering look.
- Use a neutral color temperature to avoid looking overly warm or cool on camera.
- Avoid sitting too close to the light, as this can create an unnatural glow.
For Product Photography
- Position the ring light directly above the product for even lighting.
- Use a white or neutral background to highlight the product.
- Experiment with different brightness levels to find the perfect balance.
---
Common Mistakes to Avoid
1. Overexposure: Too much light can wash out your subject. Always test the brightness before shooting.
2. Improper Positioning: Placing the ring light too high or too low can create unflattering shadows. Keep it at eye level for the best results.
3. Ignoring the Background: A cluttered or poorly lit background can detract from your subject. Pay attention to your entire setup.
4. Relying Solely on the Ring Light: While ring lights are versatile, they may not be sufficient for all scenarios. Consider using additional lighting for more complex setups.
---
Advanced Tips for Professionals
- Use a Diffuser: If your ring light doesn’t come with a built-in diffuser, consider adding one to soften the light further.
- Combine with Natural Light: Position your ring light near a window to blend natural and artificial light for a more balanced look.
- Experiment with Angles: Don’t be afraid to move the ring light around to see how different angles affect your shots.
- Invest in Quality: While budget-friendly options are available, investing in a high-quality ring light can make a significant difference in your work.
---
A ring light is more than just a trendy gadget; it’s a powerful tool that can elevate your photography, videography, and overall content creation. By understanding how to use it effectively, you can achieve professional-quality results with minimal effort. Whether you’re a beginner or a seasoned pro, the tips and techniques outlined in this guide will help you make the most of your ring light.
So, the next time you’re setting up for a shoot, a tutorial, or even a virtual meeting, remember: the right lighting can transform your work. With a ring light in your toolkit, you’re well on your way to creating stunning, well-lit content.


 Ring Light with 78.7 inch (200cm) Tripod and Phone Holders, 3 Color Modes, Bluetooth Remote Control Photography Lighting (Only Ship to US)")


![[4X Optical Zoom] Recharge power Security Camera PTZ Outdoor for Home Security with Human Detection Auto Tracking-EU Standard](https://img.kentfaith.com/cache/catalog/products/us/KF50.0003/KF50.0003-1-200x200.jpg "[4X Optical Zoom] Recharge power Security Camera PTZ Outdoor for Home Security with Human Detection Auto Tracking-EU Standard")

 Variable Neutral Density Filter with Multi-Resistant Coating Nano-Dazzle")


