How To Install Camera In House?
Before Getting Started
There’s a few things you’ll want to know before moving forward with a home security system. See checklist below.
- Decide where to place security cameras
- Type of wall material, existing wiring, proximity to wifi signals, and any other relevant details.
- Choose the right security camera
Now that you’ve outlined the preferred camera locations, the next step is to determine the type of camera that best suits your needs. The decision comes down to choosing between a wired and wireless camera surveillance system.
Wireless cameras use the home’s wifi to transmit data to cloud-storage, while wired cameras directly connect to a physical recording device. While wired cameras are more resistant to hackers, they require additional installation effort and become non-functional during power outages.
On the other hand, wireless cameras are easier to install but may be less precise, and are more vulnerable to hacking. They’re also battery-powered meaning they will require periodic battery replacement or recharging.
Gather your tools. Although most supplies will be included with the camera package, there’s always a chance you’ll need additional electrical tape or caulk and sealant, especially for an outdoor install.
- A ladder
- Cordless drill
- Screwdrivers
- Pliers
- Electrical tape or caulk and sealant
Make sure to have these items available before you start the install.
Before diving into the install, verify that your cameras work. The last thing you’d want is to discover a faulty camera after the mounting process is complete!
Choose the Right Location for Your Cameras
The first step in installing a wired security camera is to choose the right location for your cameras. You’ll want to place them in an area where they will have a clear view of the property.
- Outdoor cameras need to be mounted on a wall or roof.
- Indoor cameras can be placed on a table or shelf.
- Some cameras can be placed on a table or mounted on a wall.
- Others can be attached to a metal surface with magnets.
When it comes to installing security cameras, the type of property you’re protecting is an important consideration. If you’re protecting a home, you’ll want to place the cameras in different areas of the house, depending on what you’re trying to guard.
At home, with an outdoor camera, you may want to protect the front door, back door, windows, and any valuable items inside the home. An indoor camera can be placed in the living room, bedrooms, or any other area where you want to keep an eye on things.
The placement of the security camera installation is also an important consideration. You’ll want to place them in an area where they will have a clear view of the property. If you’re not sure where to put them, you can always consult with a professional.
Select a sturdy surface for attaching the camera base. Keep in mind cameras should be mounted at least 10 feet off the ground to prevent any criminals from tampering with the devices. Also, aim for the optimal viewing angle.
If lack of lighting is a challenge, consider installing an outdoor lamp.
- Make sure not to record your neighbors' property.
- Avoid recording in spaces that people expect privacy—like bedrooms or bathrooms.
- Have a conversation with people in your house about the cameras and make sure they’re comfortable.
- Check local laws for security camera restrictions, especially before posting a recording online.
Mount the Base and Install Your Security Camera
Most camera mounts include a drill template to assist in accurately placing screws. Use the template as a guide to drill pilot holes for the mounting screws. Insert any provided mounting pins by gently tapping them with a hammer. Lastly, secure the camera mount to the wall by screwing it into place.
- Locate the mounting bracket in the camera’s box.
- Place the bracket where you’ll want to place the camera, and use the pencil to make a dot where each screw will go.
- Make a pilot hole for the screws with a tiny drill bit.
- If you don’t have a drill, hammer the finishing nail into where each pencil mark dot is and then remove the nail.
- Use the screws to secure the mounting bracket to the wall or doorframe.
- Attach the camera to the mounting bracket. Cameras usually twist onto the bracket.
If you’re installing your camera on drywall, you’ll need to make the hole big enough to pop the drywall anchors (the plastic tubes packaged with the screws) inside. Use a drill bit or nail that is around the same size as the anchor to make the hole.
If using a wired system, begin by connecting the cable from the wall to the camera. Then, attach the camera to the power source, preferably running the cable along a ledge and securing the cord with cable clips. Finally, fasten the camera to the mount and adjust it to the desired angle. Repeat these steps at each location.
If you’re installing outdoor cameras, you’ll need to drill holes and run wires from the camera to the power source. You can do this yourself or hire an electrician to do it for you.
You can make this easier for yourself by installing wireless security cameras this way, you’ll avoid having to drill holes and run wires.
The hardest part of installing an outdoor security camera is often running the wires. If you’re not comfortable doing this, you can always hire an electrician to do it for you or purchase a wireless camera.
Wireless and Wired Camera Setup
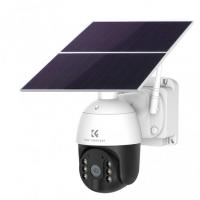
For wireless security cameras, make sure the batteries are charged. Then, set the camera up with the included software. This makes installation a breeze as you can check the software for the camera’s view while mounting, and adjust as needed.
Note: if your camera has a power cord, you can skip this step.
- Locate the charging cable, connect it to the battery pack, and plug it in.
- Download the app the camera uses to your phone.
- Open the app and create an account using the onscreen instructions.
- Log in.
- Tap the option to add a camera or new device.
- When prompted, scan the qr code on the camera’s box with your phone or select the camera from the list on the screen.
- Choose your wi-fi network from the list on the screen.
- Follow the on-screen instructions to finish up.
Once you have the app, you’ll need to connect the camera to the app so they can send information to each other.
Make sure your phone is connected to the same type of wi-fi network your camera uses. Most cameras work with a 2 ghz network. So if your phone is connected to your home’s 5 ghz network, the camera won’t connect to the app.
Wireless cameras are less likely to need professional installation, as they can be plugged into any outlet and often don’t require any type of wiring. However, it’s important to note that wireless cameras will need to be battery-powered cameras or have a continuous power supply, such as being hardwired into an electrical outlet.
Once the wires are in place, you’ll need to connect the outdoor cameras to the power source and your computer or tv. Then, you’ll be able to view the footage from your surveillance cameras.
This can be done by running a cable from the camera to the computer or tv or by using a wireless connection.
Connect It to the Network and Adjust Settings
For a wired system, connect the input cable of your wired camera to the dvr box, and make a note of which input port each camera is connected to. Then, link the dvr output port to the input slot of a monitor.
Double-check that all components are connected to a power source and that all cables are securely connected. In contrast, a wireless system is much less complex—simply follow the provided instructions to complete the setup process if it hasn’t been done already.
Once the cameras are connected, you’ll be able to view the footage from your surveillance cameras. You can do this by accessing the camera's feed through your computer or tv. You can also use a smartphone or tablet to view the footage from your cameras.
If you’re using a wireless internet connection, you’ll need to make sure that the signal is strong enough to reach your device.
Storage system for your camera’s footage. Depending on the camera, there are several options:
- Set up a cloud account for the camera using the cloud option in the app.
- Connect the camera to its local storage devices such as a dvr, computer, or nvr using the wiring that came with the camera.
- Insert the sd or mini sd card into the memory slot on the camera.
Some cameras come with a variety of settings. Wireless cameras, for example, can operate in a low-battery mode triggered by motion detection, at which point they activate and begin recording.
- Motion sensitivity
- Spotlight brightness
- Activity zones
- Detection zones
- Camera brightness
- Push notifications
- Night vision
- Facial recognition
- Video quality
- Scheduled backups
- Deleting saved videos after a certain number of days
Read your software instructions for guidance on configuring these settings via the mobile app.
Things to Keep in Mind
- The type of property you’re protecting
- The number of cameras you’ll need
- The placement of the cameras
- The type of camera you’ll need
- The budget you have for the project
- Whether or not you need a professional to install the system
- The type of monitoring you’ll need
- The features you want in a home security camera
- Your personal preferences
- The advice of a professional
Another important consideration is the number of cameras you’ll need. This will depend on the size of the property you’re protecting and the type of coverage you’re looking for from your home security systems.
For example, if you’re only looking to protect a small area, such as a front door, you won’t need as many cameras as you would if you were looking to protect a large area, such as a business building. Standalone security cameras are available in single, dual, and quad packs.
When it comes to security cameras, there are a few different types to choose from. The type of camera you’ll need will depend on the type of property you’re protecting and the coverage you’re looking for.
You will also need infrared night vision if you’re looking to protect an area that is not well-lit with a digital video recorder.
Another consideration is the budget you have for the project. Installing a security camera system can be expensive, so you’ll want to make sure you have the funds available to do so. You may also want to consider hiring a professional to install the system for you if you feel you might struggle.
Once you’ve installed your security system, it’s important to maintain it.
- Make sure the cameras are clean and free of debris.
- Check the batteries regularly to make sure they’re working properly.
- Monitor the footage regularly to make sure there’s no unusual activity.
If you notice anything unusual, be sure to investigate.