How To Save Dash Cam Footage?
Whether you need to secure footage after an accident or simply want to review a recent clip, there are several reliable ways to save dash cam footage. The method you use depends on your camera's connectivity options — micro SD card, Wi-Fi app, USB-C cable, or cloud — and how quickly you need access to the video.
Lock the Video Before It Gets Overwritten
Many dash cams have the ability to "lock" (protect) a video file from being overwritten. Some models even have a dedicated "lock" button. It's a good idea to learn where these buttons are or how to access the lock functionality before you need to actually use it.
- When you capture something on video that you want to save or protect, immediately hit the button or perform the action identified for your model. Usually, you will see an on-screen confirmation that the video file is now locked and will not be overwritten.
- If the video is especially critical — for example, you were involved in a car accident — lock the video file, then unplug and put your dash cam in a safe place until you can retrieve the video files.
- If you are really worried about losing the video and aren't sure how to protect the file from being overwritten, the best thing to do is turn the dash cam off (via either the power button or by physically unplugging it) and store it in a safe place until you can retrieve the video.
- On Garmin models, you can say "OK Garmin, save video" during the drive and it will be saved in the saved videos folder. You can also depress the lower button on the camera for a few seconds (until it bleeps) after the event, which saves the video clip and puts it in the saved video folder.
- Most importantly, do not mess with your dash cam while you are driving. The video can wait until you are safely pulled off the road.
Remove the Micro SD Card and Copy to Your Computer
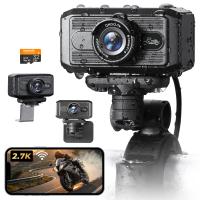
This is the simplest and highest-quality method. Most dash cams use a micro SD card. In many units you can press the card with your fingernail and it will spring out.
- Make sure your car is parked and that the dashcam is turned off before removing the memory card.
- Carefully insert your micro SD card into the SD adapter that came with your memory card. Some memory card readers can accept the micro SD card directly and don't need the adapter.
- Insert the memory card (or adapter containing the card) into the correct slot on the memory card reader. Some computers have an SD memory card reader built in; if your computer does not have a built-in card reader, you will need to use a USB memory card reader.
- Once the memory card is inserted, after a few moments an "AutoPlay" window should pop up. Select the option to "Open folder to view files."
- Use your mouse to select all the video files. Holding the left mouse-button down, drag the video files to your PC. It is recommended to drag them to the "Videos" folder in your documents.
Video files are typically MP4, which will play in most players. Older or some models may use AVI or proprietary formats; VLC Media Player or Windows Media Player can help. Many cameras separate event footage into folders — look for folders named RO, Event, Incident, or similar, as impact/locked clips are usually stored there. If you access the raw file on the card, you'll get the full original resolution (4K, 2K, etc.), which is the best source for evidence. If your computer (many Macs) only has USB-C, you'll need a USB-C card reader or adapter.
Use the Dash Cam's Smartphone App (Wi-Fi / Bluetooth)
If your dash cam has Wi-Fi (or Bluetooth + Wi-Fi), you can connect your phone directly to the camera and download clips through the manufacturer app. This is handy if you've just had an accident and want to show police or exchange evidence on the spot. Officers often accept evidence on the spot, and you avoid delays dealing with insurance later.
- Step 1: Wake the camera's Wi-Fi
- On many VIOFO models, press and hold the Wi-Fi button for approximately 5 seconds.
- Step 2: Join the dash cam's Wi-Fi network
- On your phone, join the dash cam's Wi-Fi network — not your home Wi-Fi.
- Step 3: Download the clip
- Open the dash cam app, browse to the event/locked folder, and download the clip to your phone. Remember to save the video file, not just a screenshot.
This method delivers a lower-resolution version of the clip compared to pulling the SD card directly. If you don't want to pull out the USB stick, you can buy a third-party accessory that allows download at full resolution.
Plug the Dash Cam into Your Phone via USB-C
If you have a newer phone with USB-C (iPhone 15/16 or many Androids), you can plug the dash cam directly into your phone with a USB-C cable and access files via the Files app (or the phone's file browser).
- Connect the camera to the phone using the camera's USB-C cable.
- Open Files (or the dash cam app if prompted) and navigate to DCIM / Movie / RO (or the event folder).
- Select the clip and save/download it to your phone.
This is often easier than setting up Wi-Fi and avoids app pairing frustrations. It is a great option if you just want to "plug and pull" the footage.
Plug the Dash Cam into Your Computer via USB-C
Many USB-C dash cams will appear directly on your computer when connected by cable. This works like reading the SD card without removing it.
- Your camera will mount as a removable drive.
- Navigate to the folders (DCIM, Movie, RO, Event) and drag the desired clip to your desktop.
- No SD adapter is required, and you retain full file resolution.
Download from the Cloud
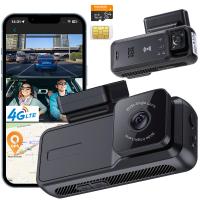
Some dash cams accept a SIM card or connect via a paired account to upload certain event videos to the cloud. You can then log in on your phone or desktop and download clips remotely.
- Cloud downloads are convenient, but often delivered at reduced resolution compared with the original file on the SD card — for example, 4K camera footage may be downsampled to 1080p or 720p.
- Cloud services typically carry a subscription cost.
- If possible, always get the original file from the camera or card for best quality and as primary evidence.
Saving Dash Cam Footage on Tesla Vehicles
Tesla's Dashcam requires a properly formatted USB flash drive inserted in the vehicle's USB port to store and retrieve footage. Vehicles manufactured beginning approximately 2020 are equipped with a pre-formatted USB flash drive in the glove box. Enable Dashcam by touching Controls > Safety > Dashcam.
- To save video footage while driving, touch the dashcam icon on the screen.
- You can also save dashcam clips by touching the dashcam icon in the app launcher while driving.
- On some models, the left scroll wheel button can be set to save dashcam on long-press — this is configurable in the menu. You can also keep "save on horn honk" enabled.
- To view and save recent clips via the Tesla app, go to Security & Drivers > Dashcam Viewer > tap on the clip > tap on Save 30 Second Clip to Photos. This requires premium connectivity. For iOS devices, requires Tesla mobile app version 4.39.5 or newer; for Android, version 4.43.5 or newer.
- The resolution is better from the USB stick, but the app method is useful in a pinch.
Avoid Screenshots — Download the Actual Video File
Screenshots are not the same resolution. A common mistake is taking screenshots from the app instead of downloading the video — that loses detail. Always download the actual video file to your phone or computer so you can pinch-zoom and extract the best quality. When sharing footage with police or insurers at the scene, show the downloaded clip from your phone.
If you can't find a clip, check alternate folders (RO, Event, Incident). Use VLC if a clip won't play in your default player — it handles more formats. Keep spare high-end micro SD cards (U3/A2 V30 recommended) for 4K recording to ensure reliable capture and retrieval of footage when you need it most.