
How To Take Photos With A Ring Light?
Mastering Photography with a Ring Light: A Comprehensive Guide
In the current age of social media and digital content creation, lighting is the secret to creating high-quality, eye-catching photos. Among the many tools available for photographers, the ring light stands out as a versatile and effective device that can elevate any shot. Whether you aim to create stunning portraits, high-impact product photos, or polished selfies, a ring light is a fantastic tool to bring consistency and vibrancy to your photography.
In this article, I'll walk you through the ins and outs of using a ring light to take photos, from setting up to fine-tuning advanced effects. By the end, you’ll have both the foundational knowledge and practical techniques to achieve professional-level results.
What is a Ring Light and Why Use It?

A ring light is a circular lighting fixture that provides even, soft light. It is particularly popular in portrait photography, videography, and beauty content creation because of its ability to minimize shadows and provide a flattering glow. The central hole allows the camera lens to sit inside the ring, ensuring direct, focused lighting on the subject.
Key advantages of a ring light include:
- Soft, uniform illumination that eliminates harsh shadows.
- Eye-catching catchlights (the reflection in a subject's eyes, creating a halo effect).
- Adjustable brightness and color temperature for customizable looks.
- Ease of use, even for beginners.
Step 1: Choosing the Right Ring Light
Before diving into photography techniques, selecting the right ring light tailored to your needs is essential. Here are a few features to consider:
1. Size:
Ring lights come in various diameters, typically ranging from 6 inches to 20 inches. Larger ring lights (12–18 inches) are ideal for portrait photography since they can evenly light larger areas. Smaller lights are portable and work well for selfies or detailed shots.
2. LED vs. Fluorescent:
While older ring lights used fluorescent bulbs, most modern versions utilize LED technology. LEDs are energy-efficient, emit less heat, and often come with adjustable brightness and color temperature settings.
3. Adjustable Settings:
Ensure your ring light offers dimmer controls and variable color temperatures. Warmer light (yellow tones) creates a cozy ambiance, while cooler light (white tones) offers a clean, clinical look.
4. Attachments and Fixtures:
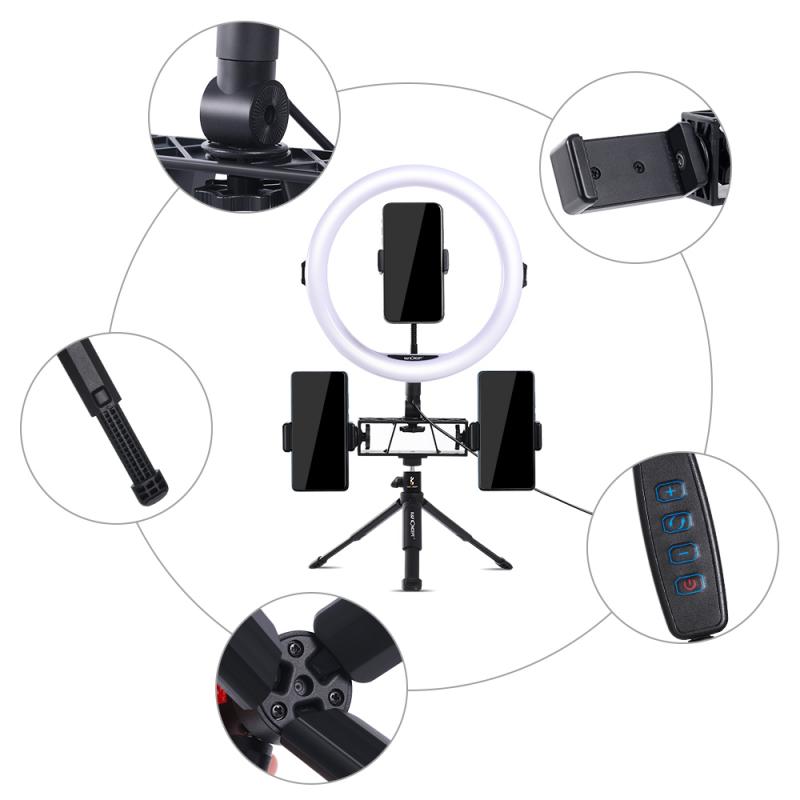
Many ring lights come with phone holders, tripods, or camera mounts. Depending on your photography style, these add-ons can make your workflow smoother.
Step 2: Setting Up the Ring Light
Setting up your ring light properly is half the battle. Here’s a step-by-step guide:
1. Assemble the Equipment:
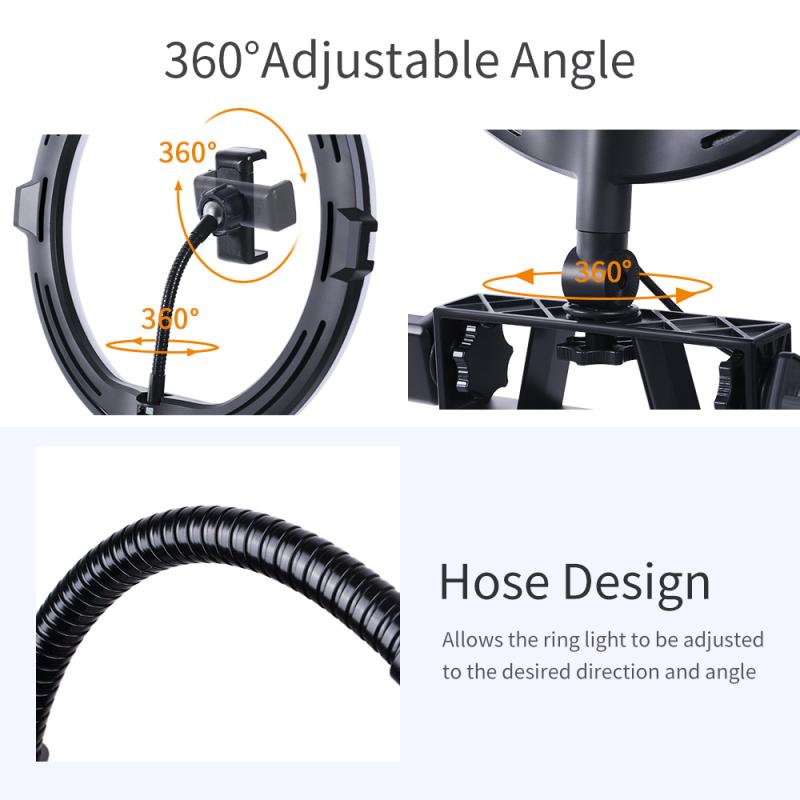
Follow the manufacturer’s guidelines to assemble your ring light, tripod, or any other attachments. Secure it on a stable surface to avoid any movement during your shoot.
2. Position the Light:
The placement of your ring light depends on the type of photography. For portraits, position the light straight in front of your subject, around eye level, to achieve even lighting.
3. Camera Placement:
Mount your camera or smartphone at the center of the ring light. This ensures that the subject receives direct illumination, reducing any side shadows.
4. Adjust Distance and Height:
Experiment with the distance between your subject and the ring light. A closer setup provides stronger, more focused light, while a greater distance results in softer illumination.
Step 3: Mastering Basic Photography with a Ring Light
Once your setup is complete, it’s time to explore the best practices for capturing visually appealing photos. Here are some tips tailored for various types of photography:
1. Portraits:
The hallmark of a ring light’s design is its ability to create beautiful, even lighting that enhances facial features. When taking portraits:
- Ensure that the subject’s face is centered in the ring light for optimal illumination.
- Direct your subject to slightly pull their chin forward to eliminate neck shadows.
- Pay attention to catchlights: the circular lights reflected in the eyes create an engaging and professional look.
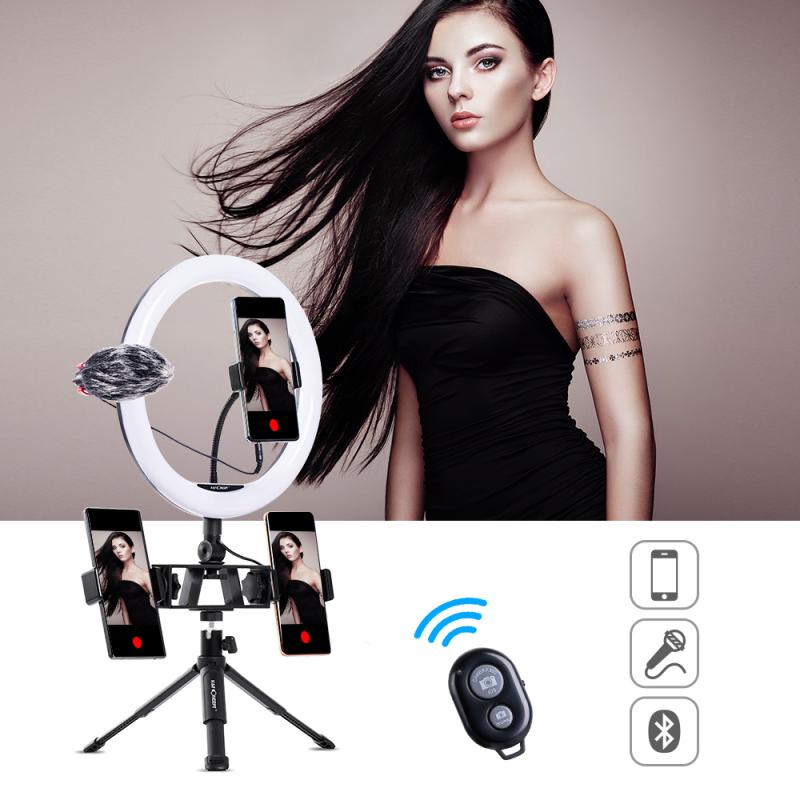
2. Selfies:
For personal photos or selfies, the key is balance:
- Use a smartphone mount to keep your device stable.
- Adjust the brightness to prevent overexposure, and test the color temperature to suit your skin tone.
- Angle slightly off-center if a straight-on look feels too static.
3. Product Photography:
Ring lights are incredibly useful for showcasing details in product photos. When photographing products:
- Position the light above the product for overhead shots or directly in front for even distribution.
- Use a white backdrop to make your item pop with clarity.
- Experiment with light intensity to highlight textures or dimensions.
4. Close-Ups and Macro Shots:
For makeup details, jewelry, or highly detailed work, the ring light is second to none in providing precision lighting. Use a higher brightness setting to highlight fine details and bring out color contrasts.
Step 4: Experimenting with Advanced Techniques
Once you’re comfortable with using your ring light for basic lighting, you can get creative and experiment with advanced effects:
1. Color Gels:
Add color gels (transparent films in various hues) over your ring light to cast a stylistic tint on your photos. This works well for creative shoots like fashion editorials or themed photography.
2. Rim Lighting:
Position the ring light behind your subject to create a glowing halo effect along the edges of their silhouette. This adds drama and dimensionality to your portraits.
3. Multiple Light Setups:
Combine the ring light with other light sources for more dynamic lighting. Use the ring light as a key light and softboxes or reflectors as fill lights for a professional studio setup.
Step 5: Troubleshooting Common Issues
Even the best equipment comes with its learning curve. Here are some common challenges and solutions:
1. Overexposure:
A ring light can sometimes produce too much brightness, washing out the subject’s features. Reduce the brightness level or position the ring light farther from your subject to mitigate this.
2. Glare on Glasses:
For subjects who wear glasses, reflections can obscure their eyes. Tilt the ring light slightly upwards or downwards to adjust the angle and eliminate glare.
3. Uneven Lighting:
If your photos look uneven, check that the subject is directly centered within the ring light. Adjusting the height and angle of the light can also help.
Step 6: Editing and Final Touch-Ups
No matter how great your lighting is, post-production can take your photography to the next level. Use basic editing apps like Adobe Lightroom or Snapseed to fine-tune the brightness, contrast, and sharpness. Pay attention to areas where the ring light may have overexposed highlights, and balance them to create a natural finish.
Conclusion
A ring light can transform your photography, whether you’re creating polished portraits, dynamic product photos, or engaging selfies. By understanding how to choose, set up, and use a ring light effectively, you can elevate your visual content to professional-grade quality.
Remember that experimenting is key. Play with angles, distances, and additional lighting sources to discover your personal style. With time and practice, the ring light will become an indispensable tool in your photography kit, helping you showcase your subject in the best possible "light."
 Ring Light with 78.7 inch (200cm) Tripod and Phone Holders, 3 Color Modes, Bluetooth Remote Control Photography Lighting (Only Ship to US)")


")


 Variable ND Filter and CPL Circular Polarizing Filter 2 in 1 with 28 Layers of Anti-reflection Green Film, Two Orange Levers, Imported White Cloth Nano-X Series")

 Photography Diffuser Collapsible Portable for Studio and Outdoor Lighting Gold Silver White Black Translucent")

")


