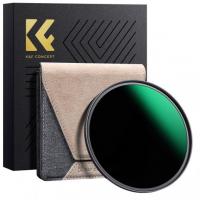
What Nd Filter For Bright Sunlight Video?
why shoot with an nd filter?
- nd filters allow you to control your exposure without having to adjust your lens aperture (thus changing the depth-of-field) or changing your iso.
- they are particularly useful when shooting outdoors, as shooting with too small an aperture can result in a loss of sharpness and 'washed out' appearance to your shot.
- the highest aperture you can shoot without diffraction depends on your lens, but typically most lenses will start to show diffraction at between f/8–f/16.
- for video recording, maintaining a consistent shutter speed is crucial to achieving a natural motion blur.
- an nd8 (3-stops) or nd16 (4-stops) filter is often used to control the exposure and maintain the desired shutter speed.
what strength nd filter do i need?
confusingly, there are three different ways that nd filters are named, however you are most likely to run into the nd number notation which expresses what fraction that the incoming light has been reduced to:
- nd2 - light exiting the filter is 1/2th the strength of the light entering the filter
- nd8 - light exiting the filter is 1/8th the strength of the light entering the filter
- nd16 - light exiting the filter is 1/16th the strength of the light entering the filter
- ... and so on
this guide will use both the nd number where available, and corresponding stops of light reduction.
nd filters by strength
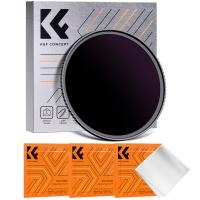
nd filters are available in different strengths, measured in stops. common strengths include nd2 (1 stop), nd4 (2 stops), nd8 (3 stops), and higher. the strength you need depends on the lighting conditions and the effect you're aiming for.
nd filters usually include the nd factor in their name, e.g. nd16, but some providers use the optical density instead, e.g. nd 1.2, for the same filter. to be sure you pick the right strength of the nd filter, double-check the number of stops in the specifications.
- 1 stop: nd2, nd 0.3
- 2 stops: nd4, nd 0.6
- 3 stops: nd8, nd 0.9
- 4 stops: nd16, nd 1.2
- 5 stops: nd32, nd 1.5
- 6 stops: nd64, nd 1.8
- 7 stops: nd128, nd 2.1
- 8 stops: nd256, nd 2.4
- 9 stops: nd512, nd 2.7
- 10 stops: nd1000, nd 3.0
- 12 stops: nd4000, nd 3.6
- 15 stops: nd32000, nd 4.5
- 16 stops: nd64000, nd 4.8
common shooting conditions
the following table gives a rough guide for how much filtration is required for common shooting conditions:
- for iso100, ~1/48 ~nd4-8 (2-3 stops)
- sunset/sunrise below horizon
- indoor lighting
- indirect sunlight/shade
- weak sunlight
- ~nd16-32 (4-5 stops)
- indoor lighting
- indirect sunlight/shade
- weak sunlight
- sunlight
- ~nd64-128 (6-7 stops)
- indirect sunlight/shade
- weak sunlight
- sunlight
- strong sunlight
- ~nd256-512 (8-9 stops)
- weak sunlight
- sunlight
- strong sunlight
- ~nd1024-2048 (10-11 stops)
- sunlight
- strong sunlight
sunny day and bright sunlight
- on a sunny day, the light is intense, and you may need a stronger nd filter to achieve the desired effect.
- a 10 stop nd filter will be the best choice for bright sunlight.
- 6 stop may also work.
- my choice is 10 stop filter for a sunny day, especially in the middle of the day.
- as the sun goes down, you may use a lesser degree of nd filter.
video recording
- for video recording, maintaining a consistent shutter speed is crucial to achieving a natural motion blur.
- an nd8 (3-stops) or nd16 (4-stops) filter is often used to control the exposure and maintain the desired shutter speed.
- nd filters allow you to control your exposure without having to adjust your lens aperture (thus changing the depth-of-field) or changing your iso.
- they are particularly useful when shooting outdoors, as shooting with too small an aperture can result in a loss of sharpness and 'washed out' appearance to your shot.
bright sunny day exposure
a bright sunny day will be a exposure predicted by the sunny 16 rule: 1/iso shutter speed at f/16.
assuming we’re talking about a digital camera with settable iso, you would normally chose for this scene something like 100–400 iso sensitivity. assuming iso 100 you have the choice of
- f/16 at 1/125 sec
- f/11 at 1/250 sec
- f/8 at 1/500 sec
- f/5.6 at 1/1000th sec
- f/4 at 1/2000th sec
all these easily reachable with a digital camera. all pretty good for general photography without using any nd filter at all.
the only need for reducing light (the purpose of a nd filter) is to get a longer shutter speed (i.e. for blurring waves and running/moving water) or to use a fast aperture like f/1.4 (i.e. to get really thin depth of field/blurred background and some bokeh).
- in that case, 3 stops (nd8) will get you f/1.4 with 1/2000th sec
- or 3 stops (nd8) will get you 1/16th sec with f/16
- or 7 stops (nd128) will get you a 1 second exposure at f/16.
- but i can’t think of any big penalties for going a few stops more and compensating with f-stop or shutter speed if you wish.
- so an 8-stop or even more filter (nd256) will cover both situations.
fixed value nds
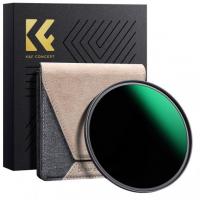
- fixed nds can be used with lenses at any focal lengths, are usually higher quality if you're buying on a budget, and can be stacked to add additional filtration.
- the amount of filters you can stack on a lens before you start to see them in the shot does vary.
- fixed nds are also available in square sheets to be used with matte boxes, allowing for much faster filter swapping without having to unscrew anything.
- fixed nds can safely be used with polarizer filters, or even combined with variable nds to add additional filtration.
variable nd
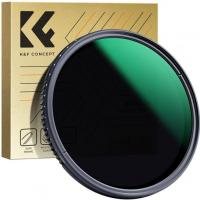
variable nds consist of two polarizing filters stacked on top of each other. by rotating one filter in relation to the other, the moiré pattern created between the filters throttles the amount of light passing through.
- variable nds are very convenient as you only require a single filter, and they also allow you to smoothly rack exposure without affecting your depth-of-field, for example if you need a traveling shot between a bright and dark location.
- however, a key drawback with the way variable nd's work is that they provide slightly different amounts of filtration depending at what angle the light rays pass through the two filters.
- in practice, this means that the wider field-of-view your lens has, the more variation you'll see across your image, in worst cases leading to an ugly 'x' pattern or vignette effect on your shots.
- your results will vary based on the quality of the variable nd, so you may see better or worse results than given above.
- variable nds should not be used in combination with a separate polarizer filter, however some variable nds have polarizers built in.
variable nd usable filtration
the below table is a rough guide for how much usable filtration can be expected from a variable nd on the three most common sensor sizes at a variety of focal lengths:
- nd8 (3 stops): ~20mm full frame, ~12mm aps-c, ~10mm mft, ~95° lens horizontal fov
- nd16 (4 stops): ~26mm full frame, ~15mm aps-c, ~13mm mft, ~74° lens horizontal fov
- nd32 (5 stops): ~31mm full frame, ~18mm aps-c, ~15mm mft, ~59° lens horizontal fov
- nd64 (6 stops): ~41mm full frame, ~24mm aps-c, ~21mm mft, ~48° lens horizontal fov
- nd128 (7 stops): ~60mm full frame, ~35mm aps-c, ~30mm mft, ~33° lens horizontal fov
- 7.5 stops: ~68mm full frame, ~40mm aps-c, ~34mm mft, ~29° lens horizontal fov
- nd256 (8 stops): ~85mm full frame, ~50mm aps-c, ~43mm mft, ~24° lens horizontal fov
- 8.5 stops: ~119mm full frame, ~70mm aps-c, ~60mm mft, ~17° lens horizontal fov
- nd512 (9 stops): ~170mm full frame, ~100mm aps-c, ~85mm mft, ~12° lens horizontal fov
built-in nds
- some cameras, lens adapters, and even lenses have nd filters built-in to them, usually positioned behind the lens elements.
- in the case of cameras, the nd setting can be quickly changed using a lever or button on the camera.
- for lens/adapter nds, they usually have to be manually swapped in a similar way to a drop-in matte box.
- variable nds mounted behind the lens work with lenses at any focal length, though typically built-in variable nds in cameras use an electronic lcd-based system rather than mechanically rotated polarizers.
graduated nd filters
- graduated filters (often just called 'grads') provide a gradient of nd strength over the filter.
- these are utility filters useful in situations where you're shooting scenes with vastly different exposures in different parts of the image.
- for example, one such use would be for shooting a landscape with a bright sky.
- in that scenario, a graduated filter can be used to reduce the brightness of the sky more than the ground below it, resulting in a more evenly exposed shot.
- there are many varieties of graduated filter with different patterns and gradients for various uses.